For hdri map colour correction, I highly recommend you to use Photoshop. Please download and open FREE_HDR_103 hdr map from here and open it in Photoshop. For this tutorial, I am using Photoshop CS6 as it is the latest version available without subscription-based rental.
1. Open HDRI Map in Photoshop
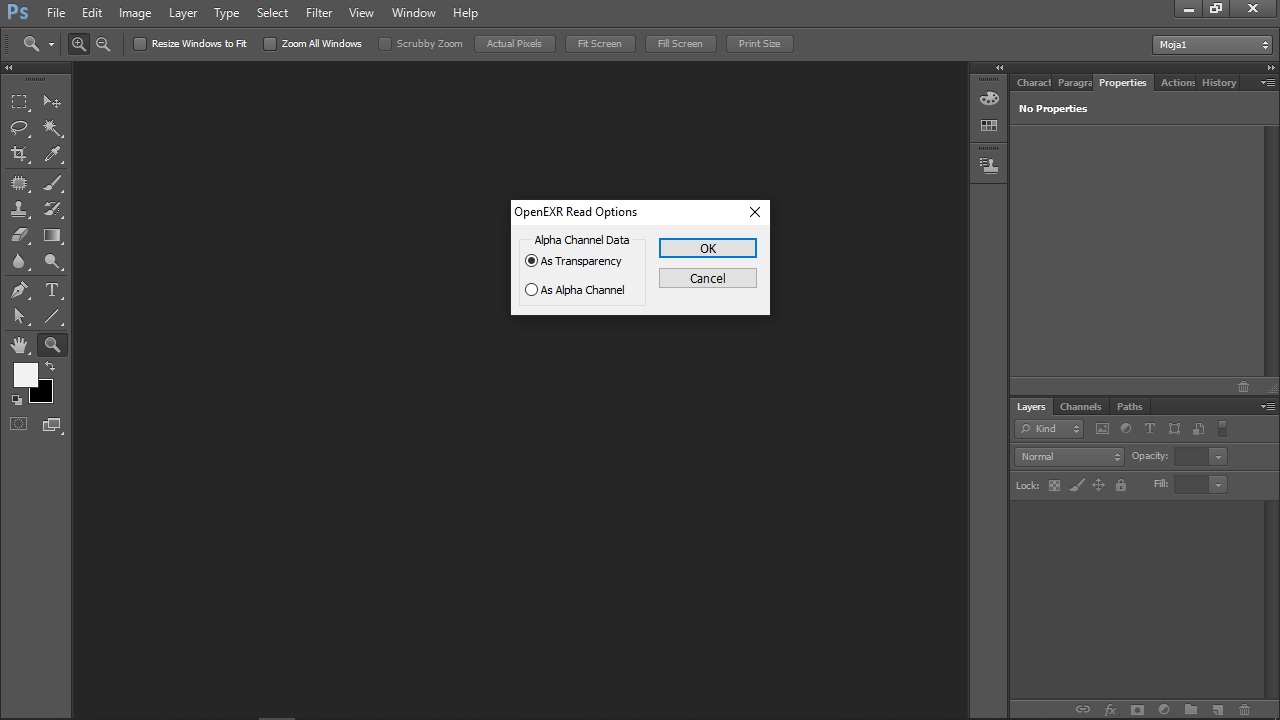
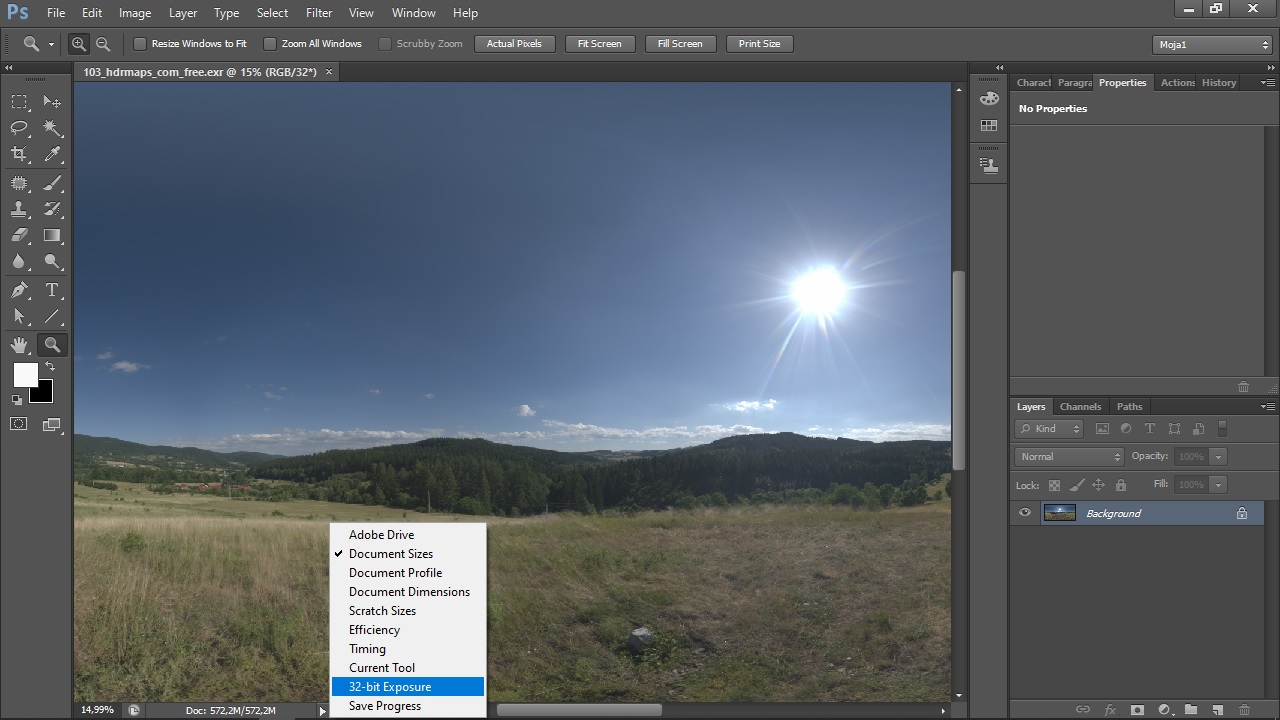
2. Enable 32-bit Exposure preview slider
Click OK and in the bottom left corner switch little slider to 32-bit Exposure. Now when you move slider left or right you can darken or brighten hdri image preview.
If your hdri is too dark or too bright, and you want to fix it, you have to use Image > Adjustment > Exposure.
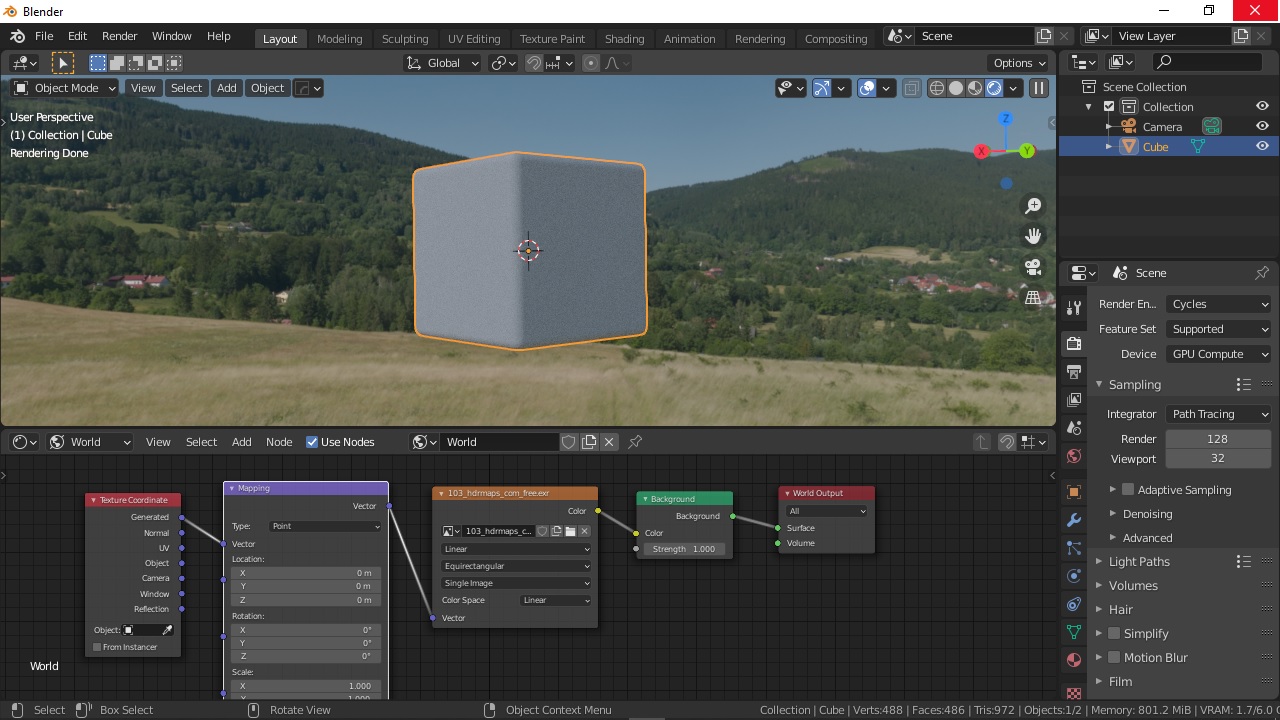
3. Set-up reference environment
I use Blender Cycles engine for tuning up my hdri map, as this is a software is free so available to everyone.
- Simply start a new project with default cube, delete a lamp,
- with Node Wrangler enabled, CTRL + T to add new environment texture in Shader Editor,
- ALT + SHIFT + Z to hide Overlays. That’s it.
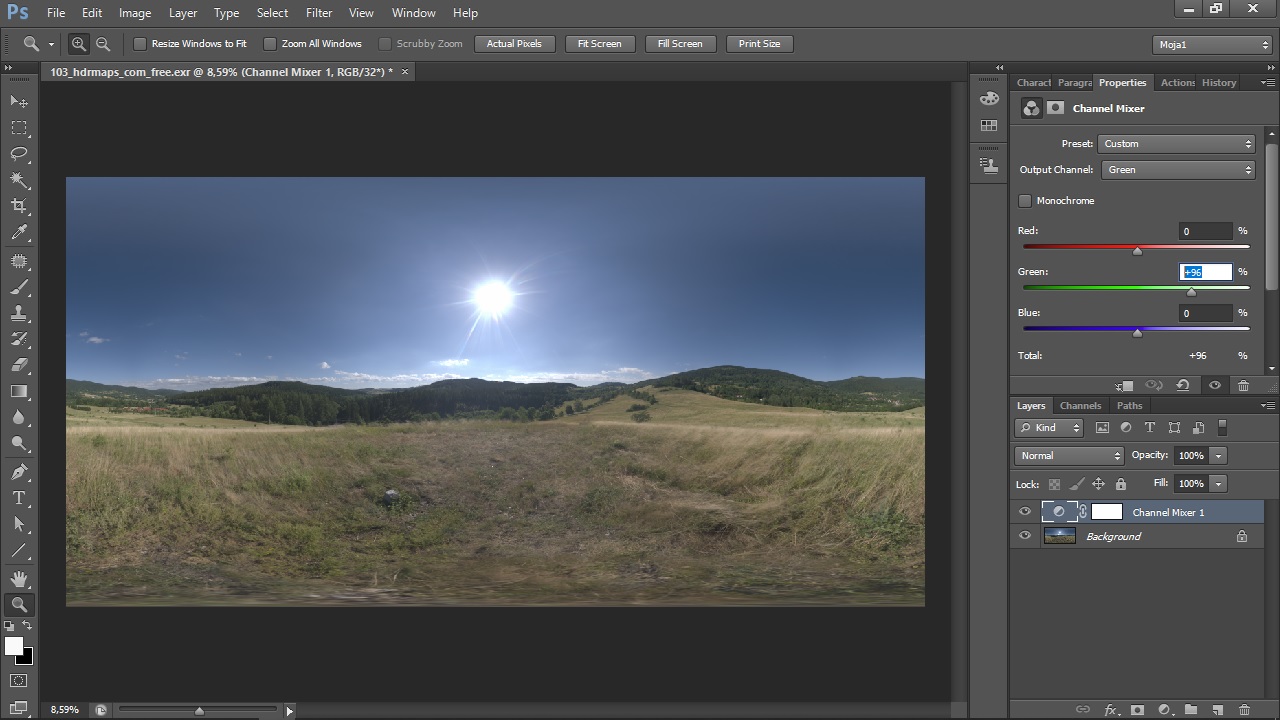
4. Back to Photoshop for hdri color correction
Create a new adjustment layer Channel Mixer and tune it to your needs. Testing hdri map file produces way too much green tint as it can be seen on reference scene screenshot, mostly because it was shot in the middle of a grassy meadow, grass can be seen almost everywhere around. In this example, I need to set Output Channel to Green and decrease Green value to 91%. Make sure that you have a backup of .exr file and overwrite the original file with command Save As and default compression method.
5. Blender – preview hdri map once again
In shader Editor, select environment texture and reload it using ALT + R shortcut. if you can’t see difference, turn off Cycles preview and switch it back on.
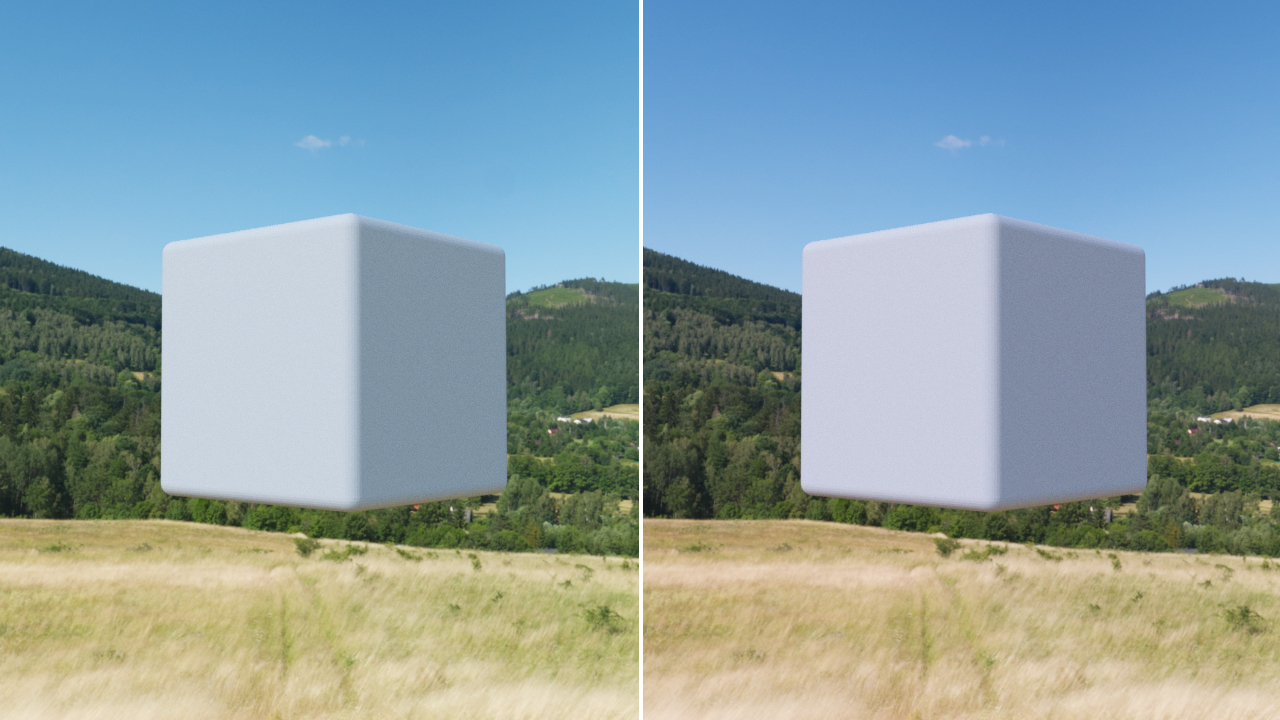
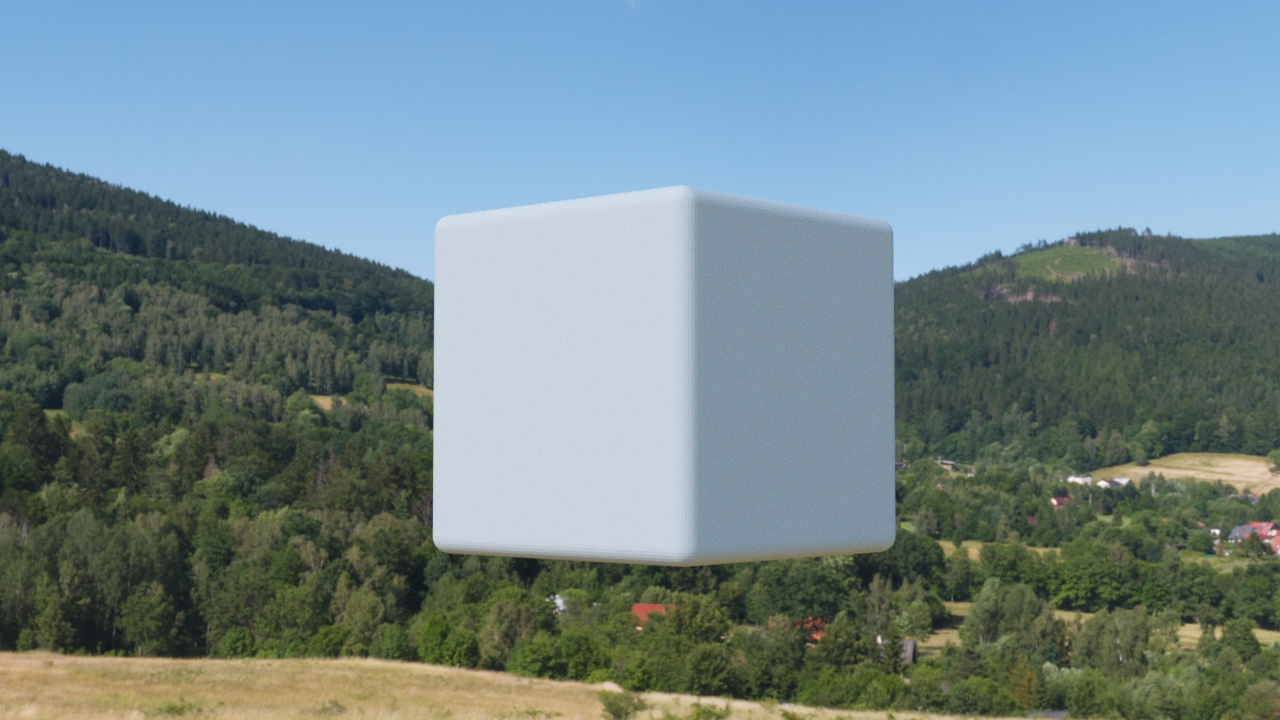
As you can see on the test renders above, Blender’s default cube looks more natural on render where original hdri map was used, but the background is a way too much green. Background hdri looks better on the right side to my taste. So let’s combine those two hdri maps for the final scene using Blender Cycles shading.
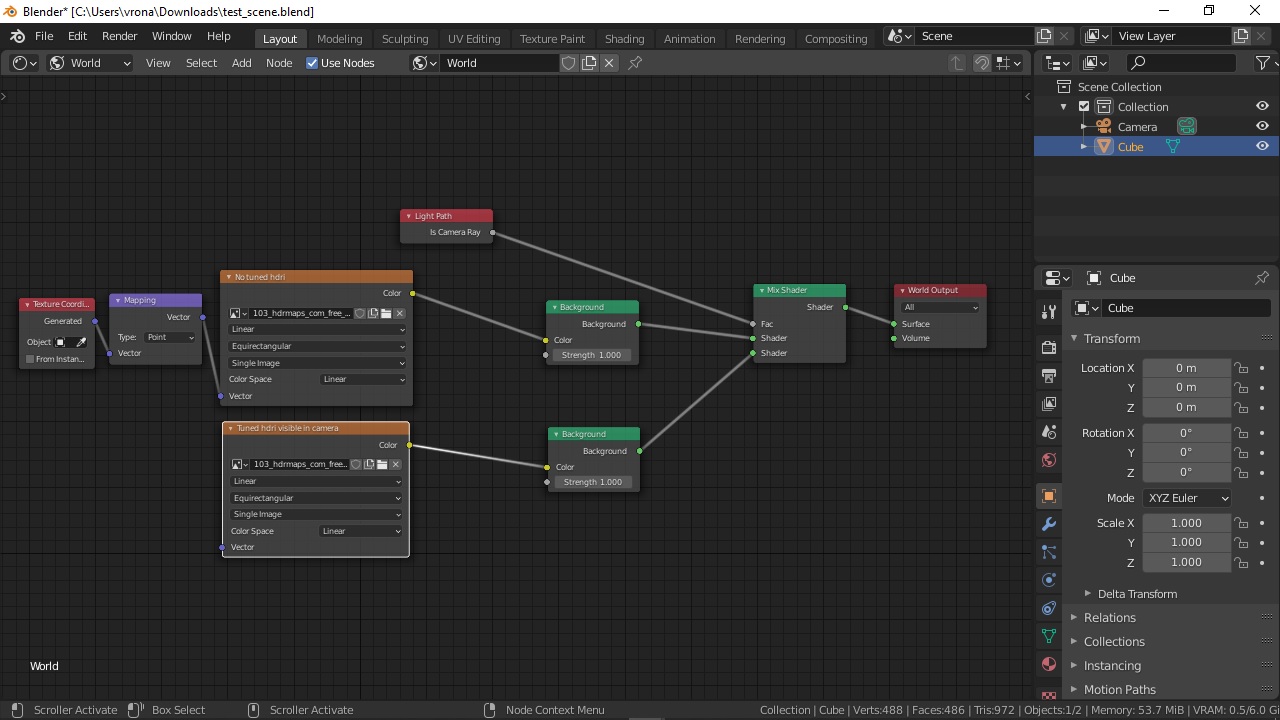
6. Create camera visible only envrionment in Blender Cycles
Using two hdri maps, original and tweaked one, we will set one to be visible only to Camera and the second one for everything else (reflections, shadows etc). Following node scheme is self-explanatory. If you need more contrast in the light, simply add Gamma node before Background Node.