A quick tutorial on different environment setups inside Octane Render standalone. Easy to follow steps for beginners and advanced users.
To reproduce this short HowTo, I am using the latest version of Octane Standalone available without paying monthly subscription fees: Octane version 4.04.
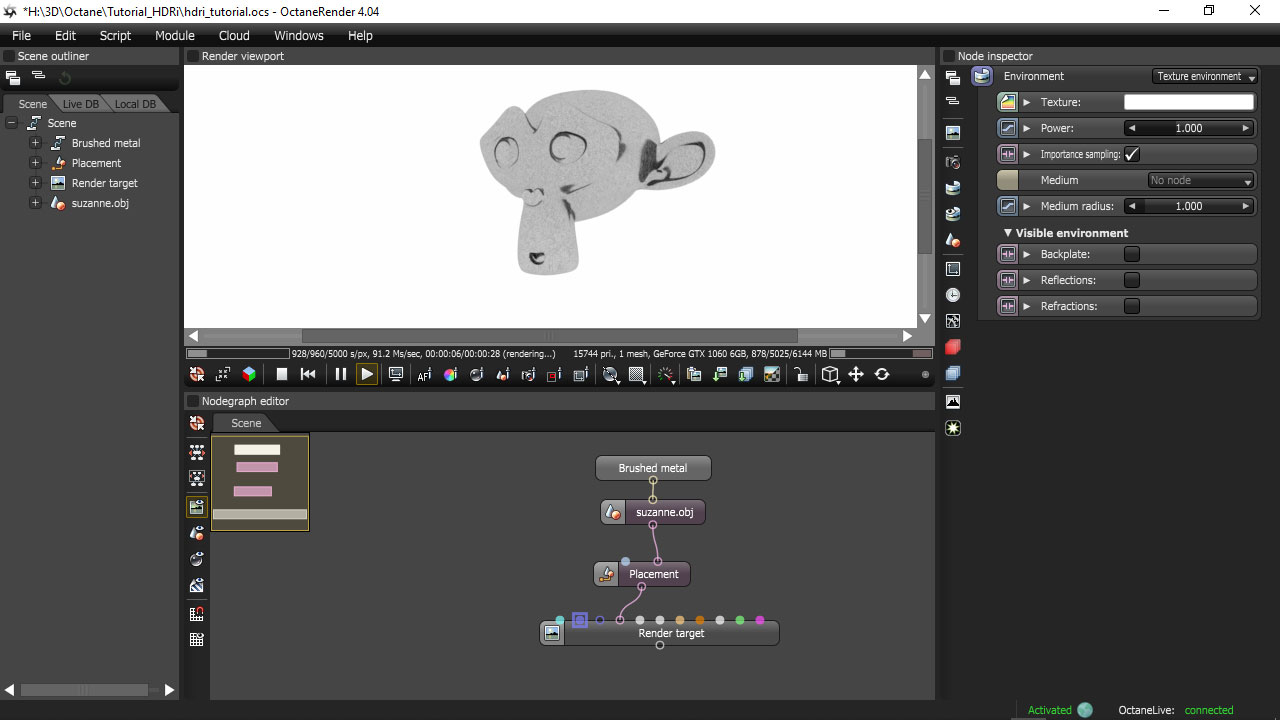
Setting up a simple 3D scene
- Right-click on Node Graph Editor and insert Render Target node.
- Add some geometry to the scene: Right-click on editor Geometry> Mesh and choose your .obj file (I am Blender user so Suzanne is an obvious choice).
- Add Geometry > Placement node between .obj and Render Target node so it looks like on the picture below. With Placement node, you’d be able to control the position and rotation of the imported model later on.
- Scroll and rotate in Render Viewport so your .obj model fits nicely
- Apply the material to the mesh. Grab it from LiveDB or create yours, with nice metallic or glossy reflections
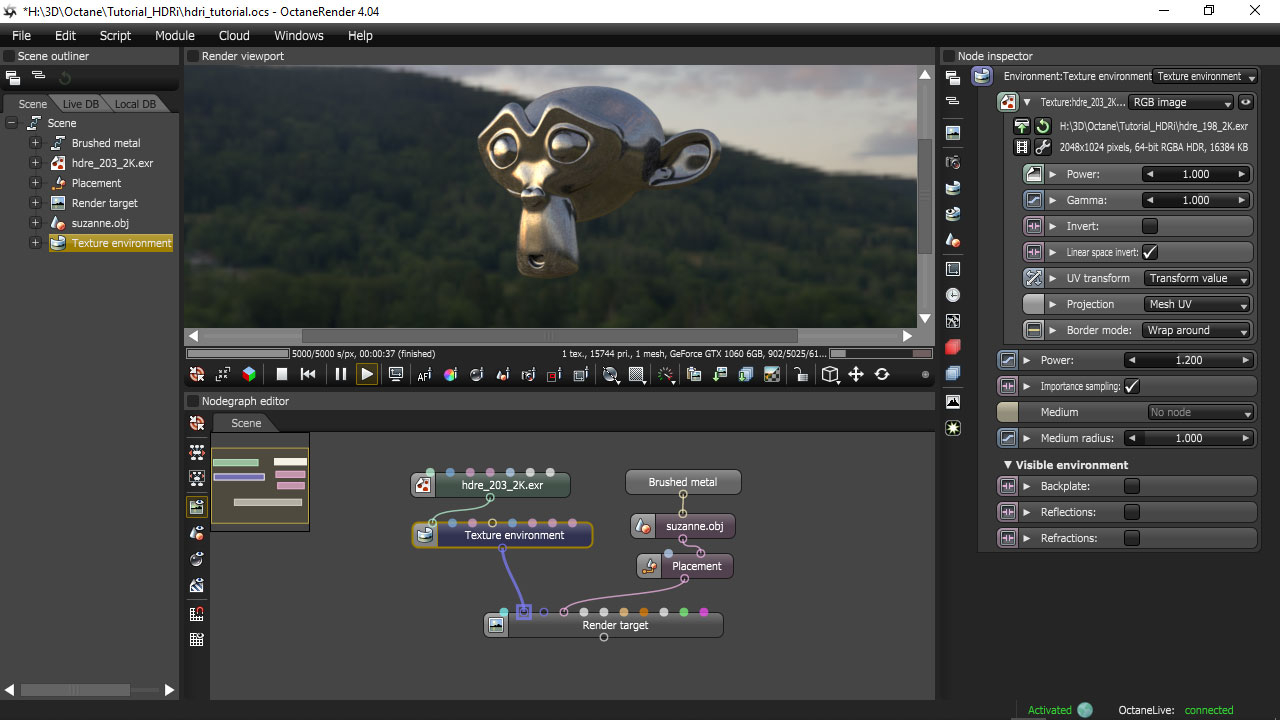
HDRi setup with nodes only
- You can easily set-up hdri as an Environment > Texture Environment in Node Inspector, but for the sake of this tutorial, we will take more bumpy road, by setting it with nodes only. So right-click on Nodegraph editor and add Environments > Texture environment and connect it to Render Target.
- Add Textures > RGB image node, choose 32-bit HDRI spherical map file. Connect image to Texture environment node. That’s it. Well done!
- You can control the power of hdri lighting at Texture Environment node. If you need more contrast lighting or stronger shadows, go and increase Gamma value available at Texture node.
- To rotate HDRI, click on texture node, and in UV transform slide over T.X and T.Y sliders. As you could notice Projection node is set to UV Mesh projection by default, nevertheless it’s working correctly, because the texture is connected directly to the Texture environment node.
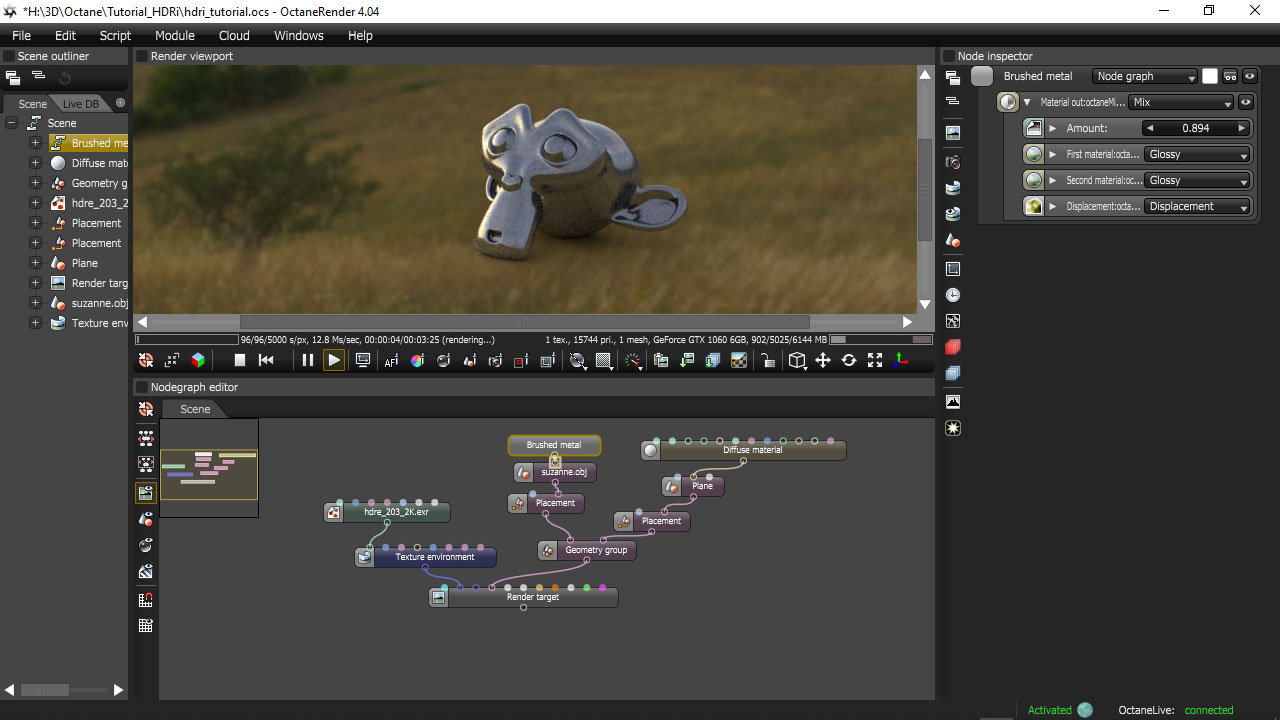
Shadow Catcher in Octane Render
- Add Geometry > Plane node or import plane .obj to the scene.
- Add Geometry > Placement node, or go faster and duplicate existing one (copy & paste) and connect it to Plane model
- Add Geometry > Group node and plug placement nodes of test and plane into geometry node, then geometry node to Render target.
- Click on plane’s Placement node and play with Transformation > T.Y value so it fits just under your test model.
- Click on test model Placement node, and rotate it Transformation > R.X or R.Z, so it is laying correctly over the plane mesh.
- Add Materials > Diffuse material to the plane. Click on Diffuse material node and check Shadow Catcher
Now your model is casting shadows on an invisible plane object. Well done.
Visible and not visible environments
With Octane Render you can set-up texture environments so they are visible to the camera (Backplate), visible to Reflections and visible to Refractions independently. In our example, the hdri map is 2K only, so let’s use it for Reflections and Refractions only and for Camera visible environment we will use the same map but in higher resolution and tonemapped to 8-bit jpeg. You can create your own background file by converting 32-bit to 8-bit in Photoshop, Photomatix or free Picturenaut.
- Click on the node with hdri texture and reset UV transforms to its defaults
- Duplicate two nodes: Texture environment and hdri node and connect it to Render Target’s empty Visible environment slot. Set its Visible environment to Backplate only.
- For visible texture choose 8-bit .jpeg file from your disk. Make sure to set Gamma to 2.2
- To control both environments simultaneously add Projection > Spherical node and plug it into both texture slots. Rotate both environments simply by sliding over Sphere Transformation > R.Y slider.
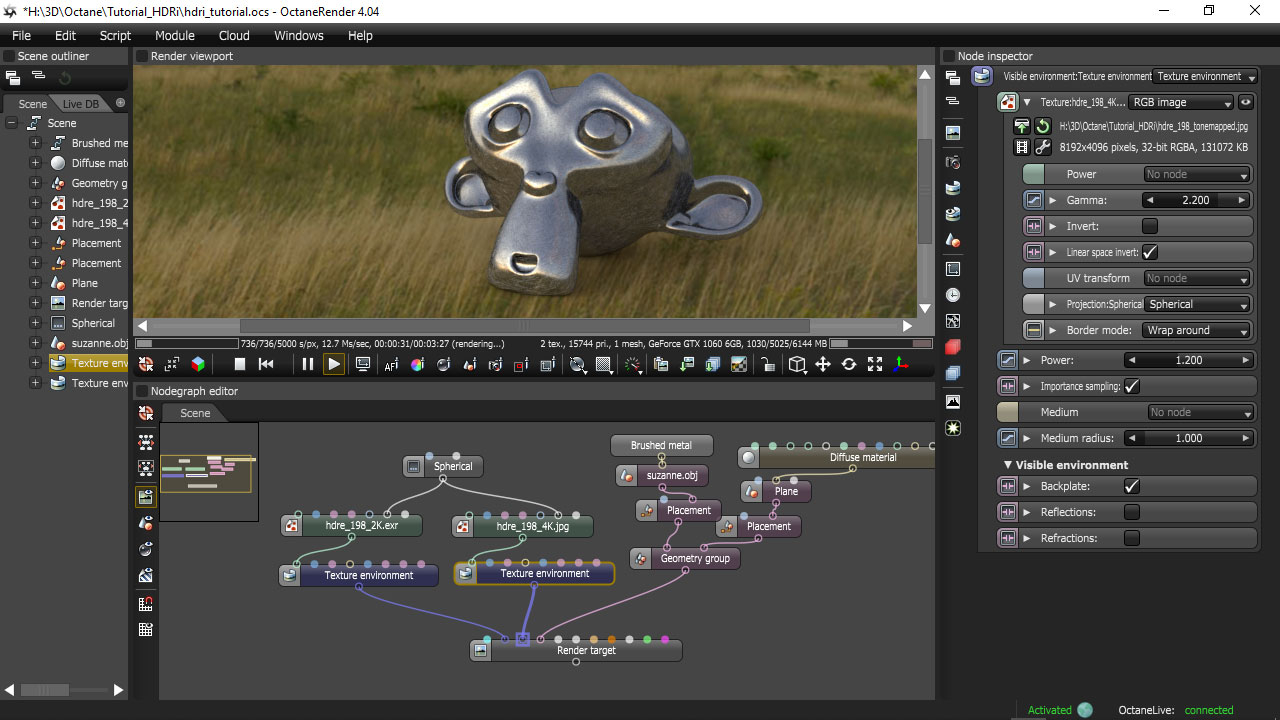
Image backplate
If you want to render onto backplate image without visible environment follow these steps.
- Find on viewport toolbar icon with an option to change the background image. On my UI it is 7th icon from the end. Load background image matching your viewport ratio from disk.
- Go to Kernel settings and in Alpha Channel check Alpha channel
- Transform and tweak your environment so lighting is close to this what you see on backplate image.
You can download Octane project for this tutorial by clicking here.
Keep in mind that you can legally use free version of Octane Render for Blender.