1. VRay Renderer
First, you need to enable V-Ray rendering engine for your project.
In main, upper menu, go to the Rendering > Render Setup, or simply press F10 shortcut key.
Choose V-Ray as a Renderer. If you have a decent GPU card, use V-Ray GPU. Close Render Setup window.

2. VRay Physical Camera.
The next thing to do is to add VRay Physical Camera.
You can skip this part, and simply add 3ds Max Physical camera, which should be compatible with Vray Physical Camera.
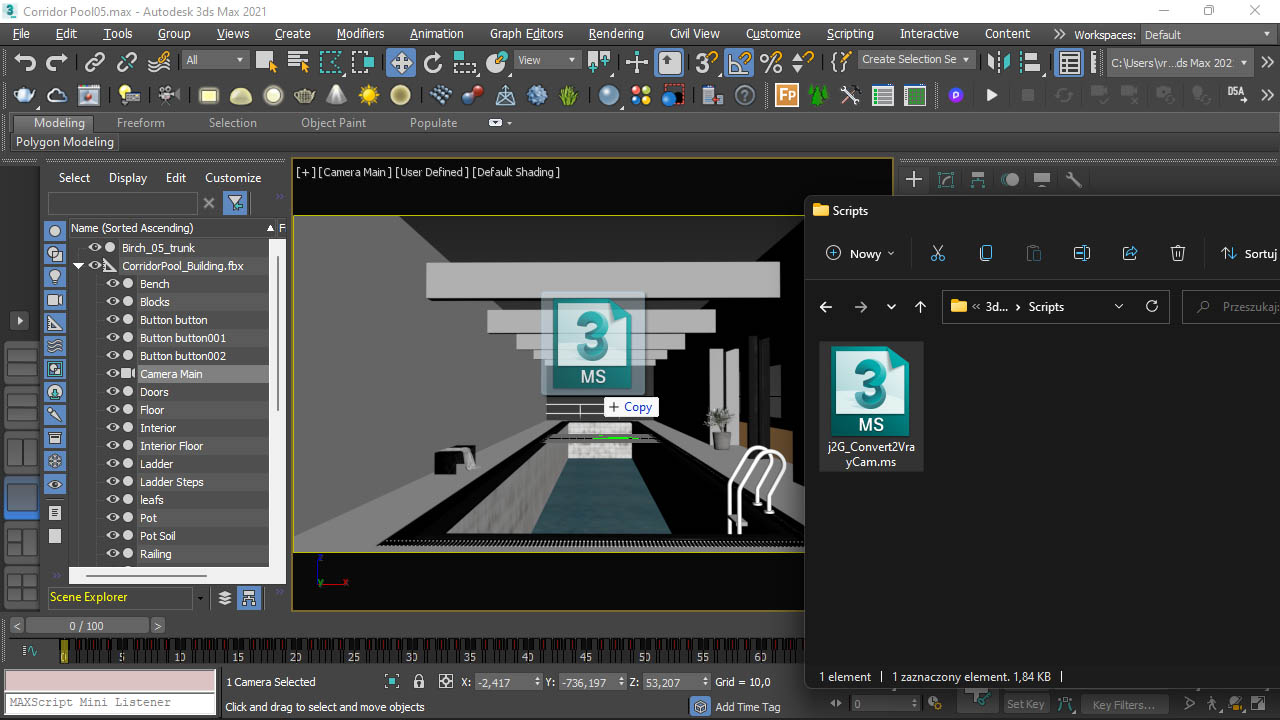
In the newer versions of 3ds Max and Vray, VRay Physical Camera is “hidden” and not selectable from any menu. However, you can still create it using a script.
Simply paste vrayCreateVRayPhysicalCamera() to bottom-left corner, where it says MAXScript Mini Listener and press Enter. That will create VRayPhysicalCamera() with coordinates (0,0,0).
Alternatively, you can turn any existing camera to VRay Physical Camera, and this is what I recommend you to do. Select an existing camera object at Scene Explorer, change viewport to the selected camera by pressing “C” shortcut, and finally drag and drop j2G_Convert2VrayCam.ms script into the window (To get script, you need to open the link, CTRL+S to save it to your drive, without changing an extension).
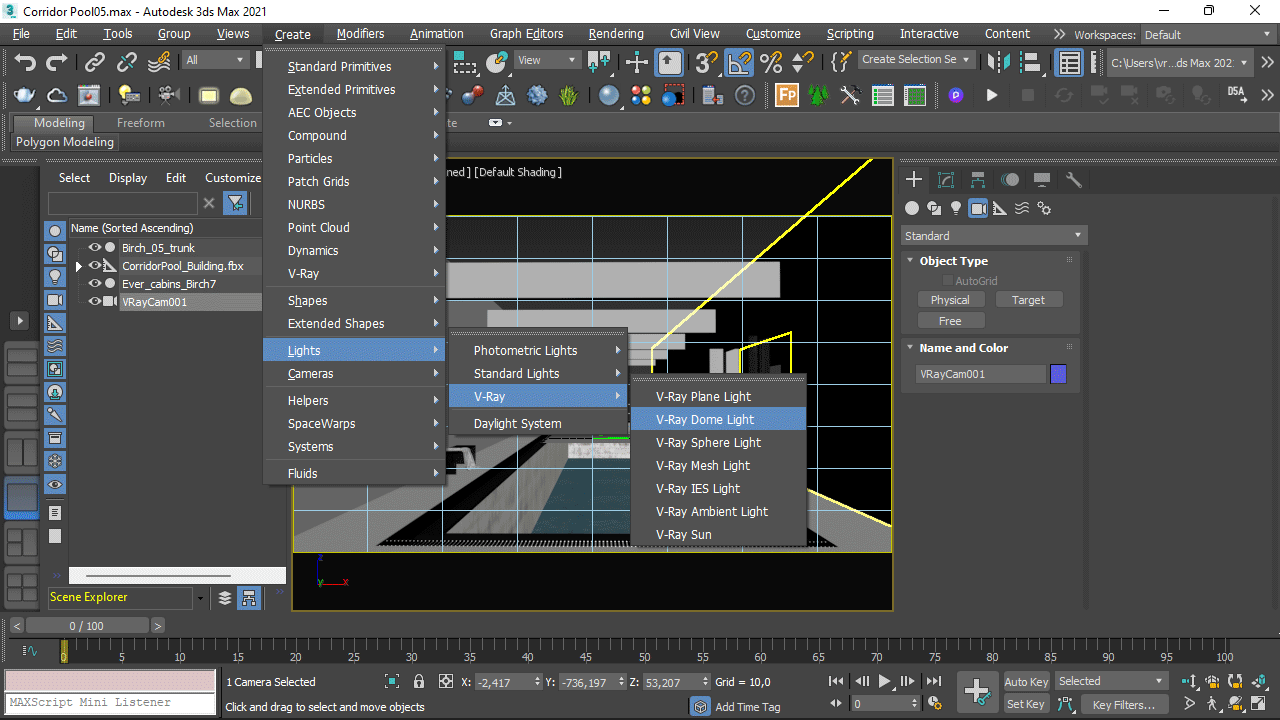
3. Creating Vray Dome Light
Change Viewport perspective to top (shortcut T).
Go to the menu Create > Lights > V-Ray > V-Ray Dome Light, or use icon to select V-Ray Dome Light.
Click at any place, where you want to create V-Ray Dome Light.
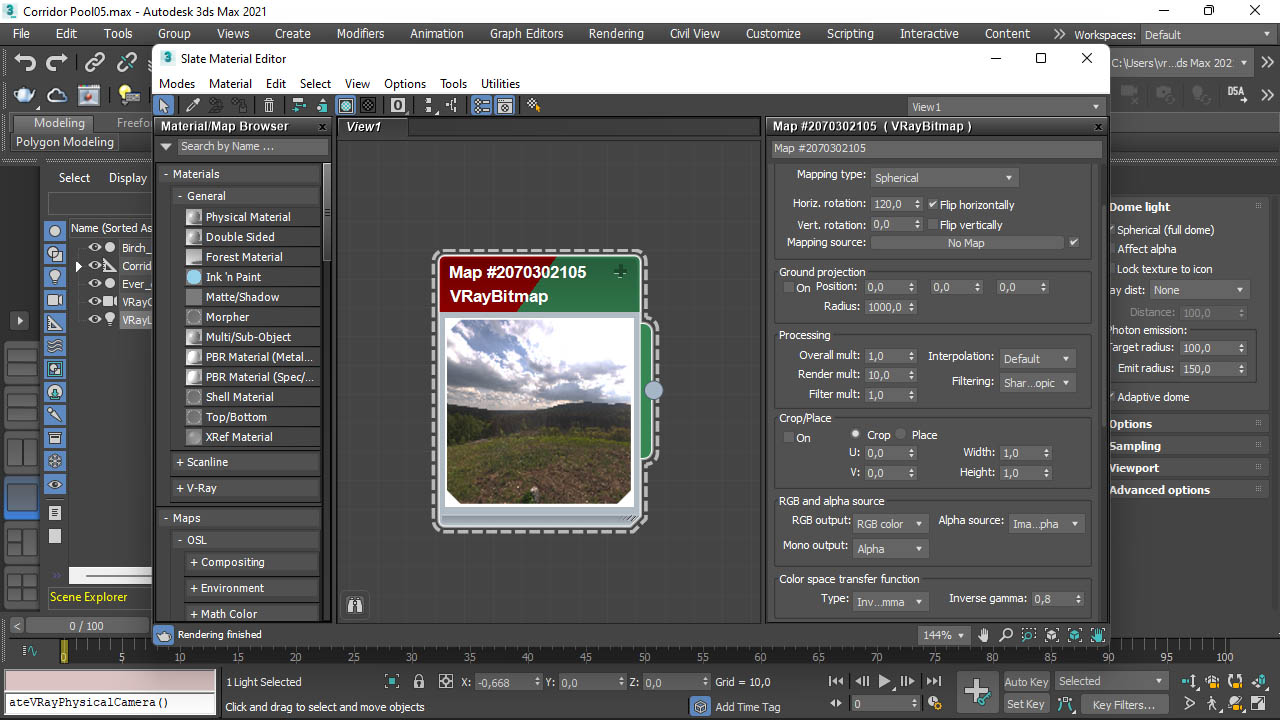
In General settings at the right side, click on “No Map button“, search for VRayBitmap, click on it.
It will open a window titled “Choose HDR image“. Load any hdri map you’d like from your drive.
If you don’t have any hdri map you can download it for free from here.
Another way of loading hdri to V-Ray Dome light is to create in Slate Material Editor a VRayBitmap, loading hdri map (don’t forget to set Mapping type to Spherical), and linking node’s output as an Instance to the map slot of VRay Dome Light.
Open Slate Material Editor, by pressing the M key. While keeping V-Ray Dome Light selected,
in the upper menu use Material > Get from Selected, to easily navigate to VRrayBitmap node.
Click on it twice, to get access to all settings.
Before starting Vray RT preview, you need to change few settings here:
– Flip horizontally must be checked
– Set Inverse Gamma somewhere around 0,8. Lowering gamma value introduces more contrast to the light.
– If you want to rotate HDRI Map, just change Horizontal Rotation
– Most of the hdri maps will be too dark, so you need to set Processing > Render multiply value to some higher value.
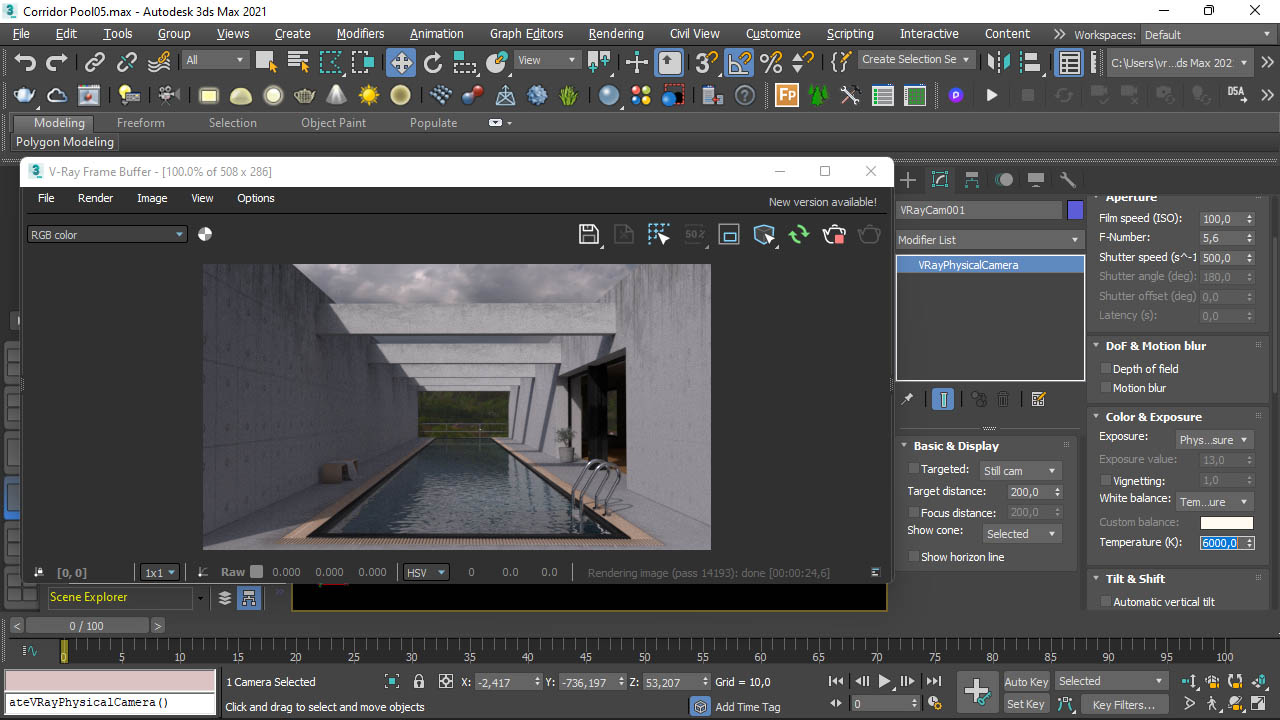
4. VRay RT preview and final tweaks
Press key C in the viewport, and select VRay camera view.
Start V-Ray RT and tweak hdri settings in the Slate Material Editor until it satisfies your needs.
If you are not happy with the color balance HDRI map produces, you can easily select your VRay Physical Camera, go to the Modify tab, and play with settings at Color & Exposure section.