In this tutorial, you will learn how to create realistic lighting for exterior visualizations in Blender. Let’s get started. First and foremost, get quallity hdri sky map. For this, head over to hdrmaps.com, and get some hdri sky map. Of course you can get some hdris for free, but when quallity matters, I recommend you to pay and download them from hdrmaps.com. You can test lower resolution sample for free, and if you like it, just pay for it later on.
Blender 3.2 Cycles HDRi Set-up
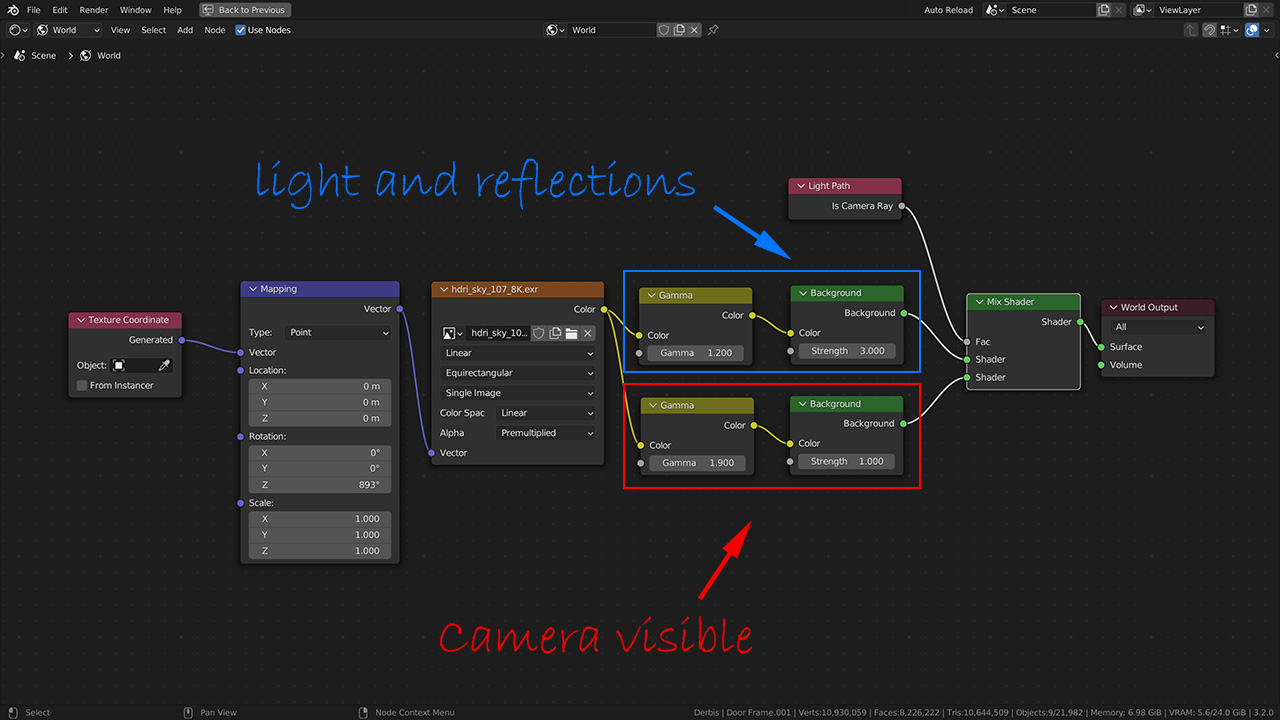
- With node wrangler add-on enabled, add environment texture and load hdri. For better performance, I recommend you to begin with lower resolution hdri map.
- Add Gamma correction node, and duplicate those two nodes (background and gamma). Move it to the bottom. Combine nodes with Mix Shader. Reconnect bottom nodes to the texture.
- Add Light Path Node, and use its Is Camera Ray output as mixing factor. Use control plus H to hide not needed slots.
- Increase Gamma for lighting hdri map to around 1.2 or 1.4. The bottom one part, is camera visible background, so increase it even more, up to 2.0.
- Rotate hdri map to find the best settings (Mapping node > Rotation Z)
- You can also increase lighting hdri map’s power, if it’s too dark.
- For the final rendering don’t forget to replace lower resolution hdri map with full resolution one.
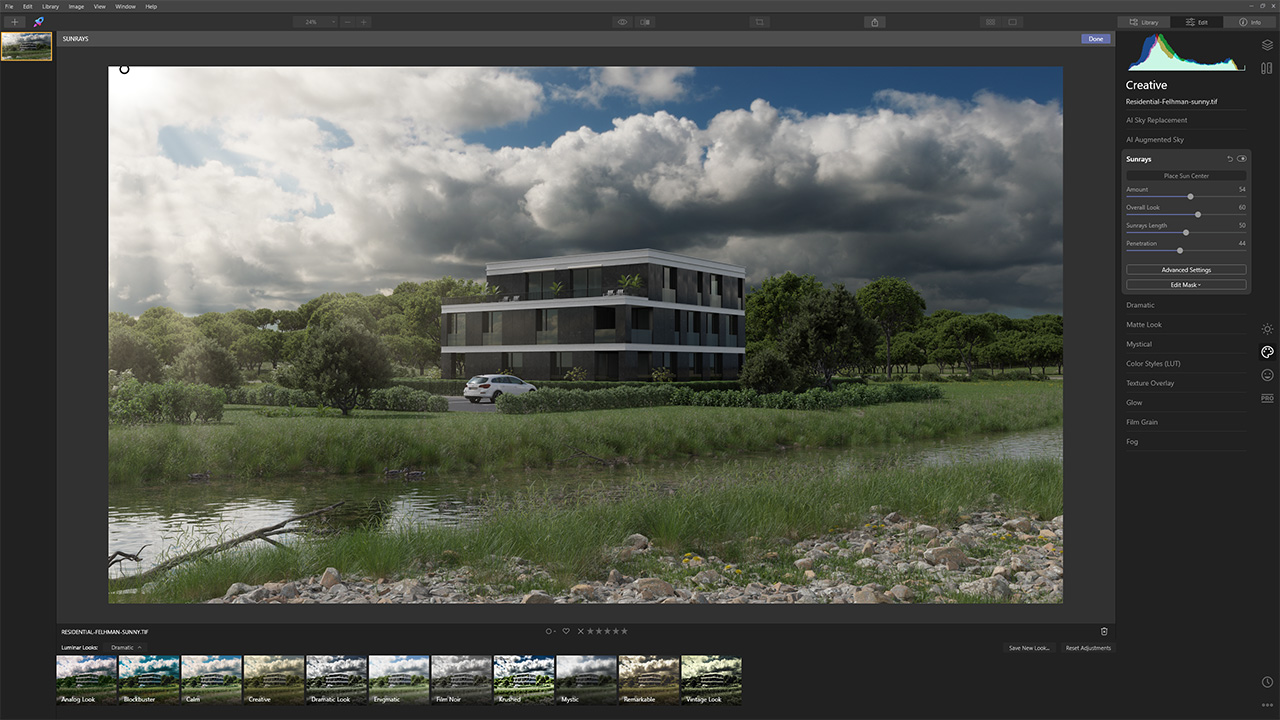
Post Production volumetrics effect in Luminar
Before color correction in the Lightroom, I recommend you to add some volumetric effects in Photoshop or Luminar. I choose Luminar as it is very fast and easiest way for spicing my renderings. With one click you get convincing sun rays anywhere you want.
Post Processing in Adobe Lightroom Classic
- Adjust exposure, and contrast.
- Use HSL sliders to tweak saturation for separate colours. Very often you will also need to adjust Hue for each colours group, so everything looks more real.
- I found Cycles Renderings to be very often not sharp, so add some texture and sharpness.
- Don’t forget about vignette to emphasize point of interest, especially when you want to bring focus to the centre.
- Add some film grain, so your rendering looks more organic, also it helps to hide banding in exported images