Autopano Giga is an older panorama stitching software that is no longer being developed. However, it is available for free and remains the only no-cost solution for stitching HDRI maps effectively (apologies to Hugin). It serves as a free alternative to the expensive PTGui Pro for creating panoramic images. In the following tutorial, I will guide you through the process of stitching HDRI environment maps in Autopano Giga, as the procedure is not entirely straightforward. Learn more about Autopano Giga free license here.
The aim of this tutorial is not to explore all the functionalities of Autopano Giga but to focus on specific settings that are beneficial for creating HDRI maps. I will assume that the source photos have been taken with precision, eliminating the need to add extra control points.
1. Develop RAW images
Prepare all RAW files in the software of your choice, such as Adobe Lightroom, RawTherapee, or any other preferred tool. Utilize a flat profile for the photos, ensure the white balance is consistent across all images, clean them of sensor dust, and remove chromatic aberrations. Avoid altering other settings. Finally, export the RAW files as 16-bit TIFF files to preserve as much detail as possible.
2. Load tiff files to Autopano Giga
Open Autopano Giga (APG) and drag & drop the exported TIFF images into the program. Wait some time. Loaded images should appear in the small box.
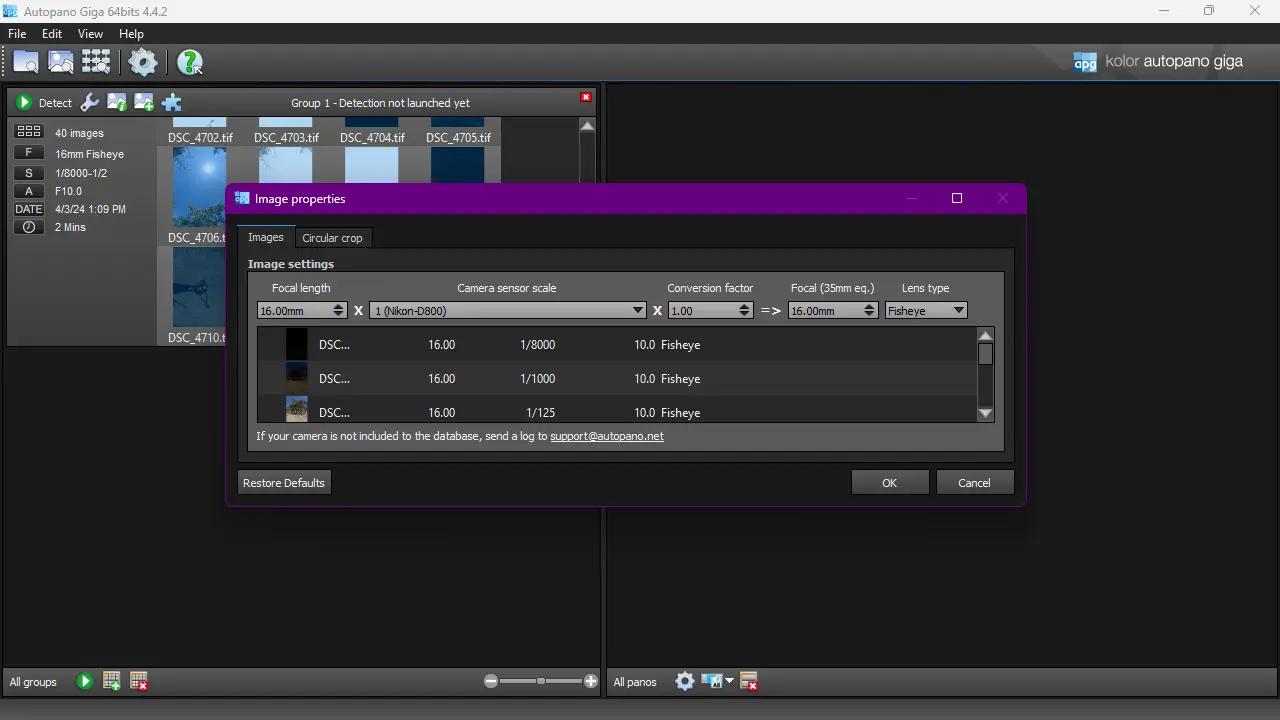
3. Lens properties
Click on the image icon labeled with an “i” (Image Properties) to verify that the lens was correctly identified. In my case, I had to change the Lens Type to “Fisheye“, because that was a lens I have used with my camera.
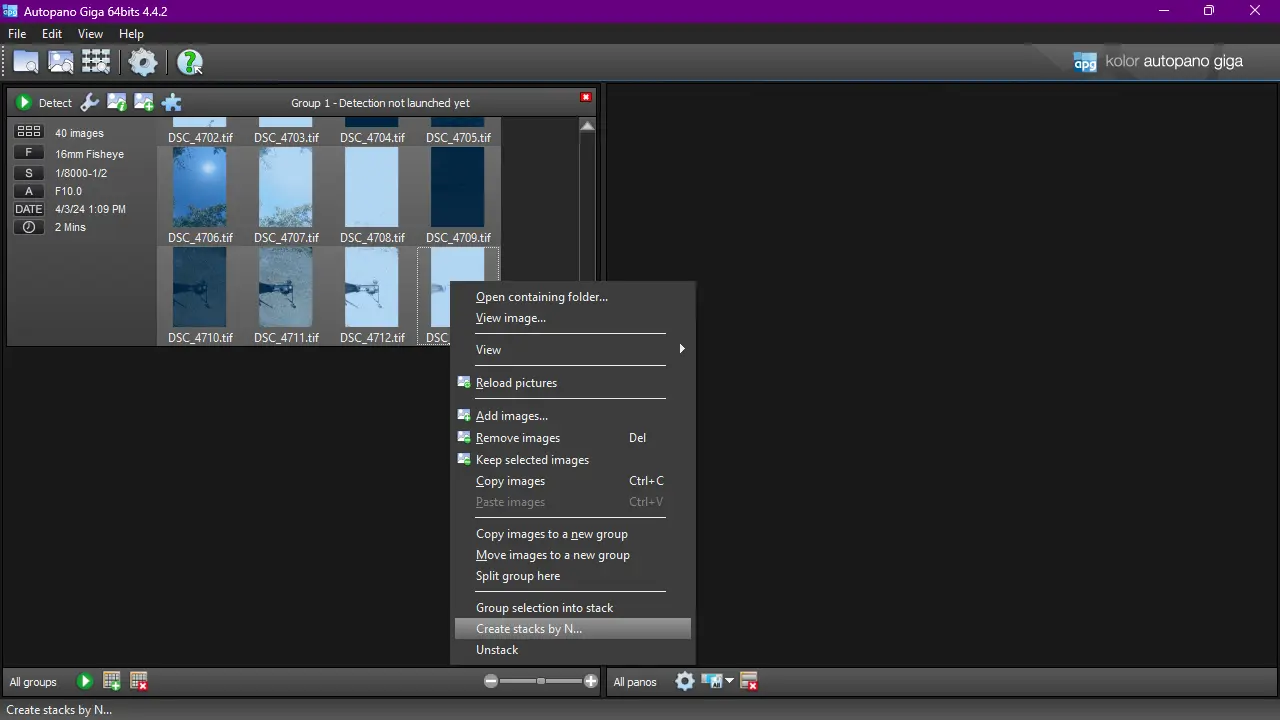
4. Create stacks
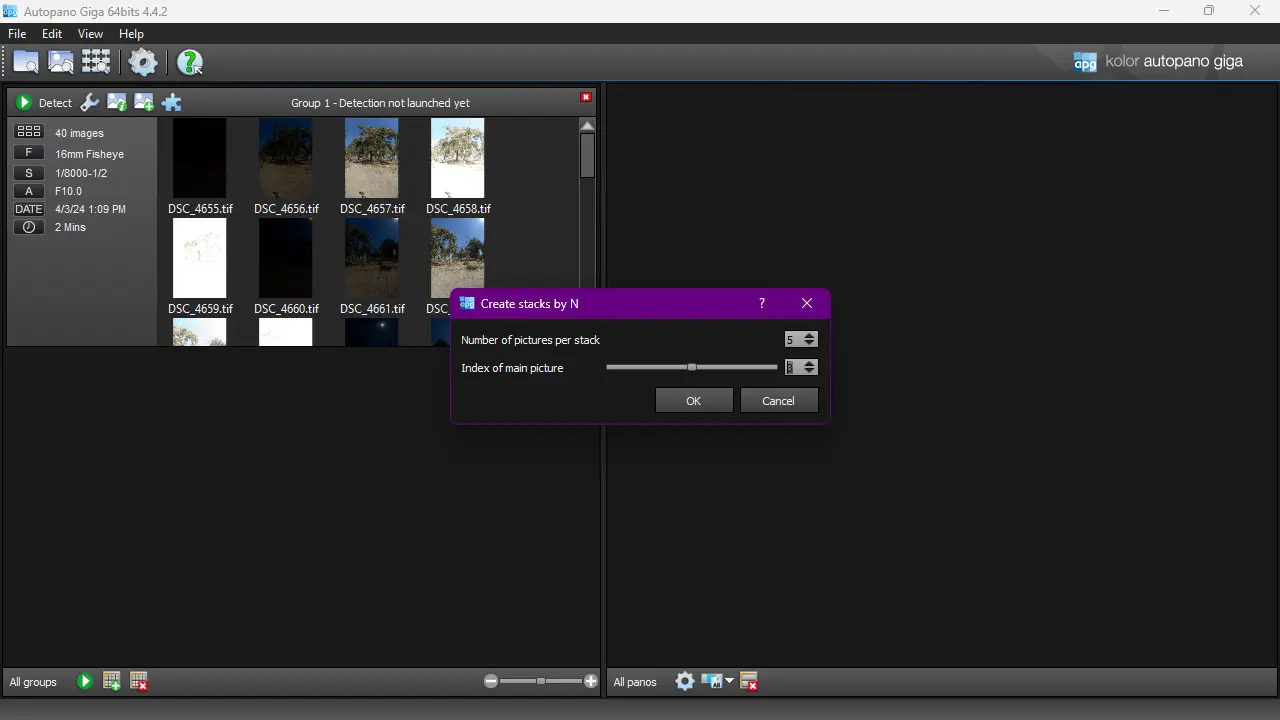
Right click on the box with images and choose: Create stacks by N
Enter the correct number of pictures per stack; for my type of bracketing, it is 5. I also changed the Index of the main picture to 3, as every third image in the bracketing series typically has the best exposure (you can choose any number that suits your needs here; it’s only for preview purposes).
5. Group settings
Click on Group Settings, new window will pop up.
Detection tab:
1. In Links field, enable Force every image to be in on panorama.
2. In Project field, I advice you to use source folder. Just type there %i.
3. In Automate disable Auto color Correction.
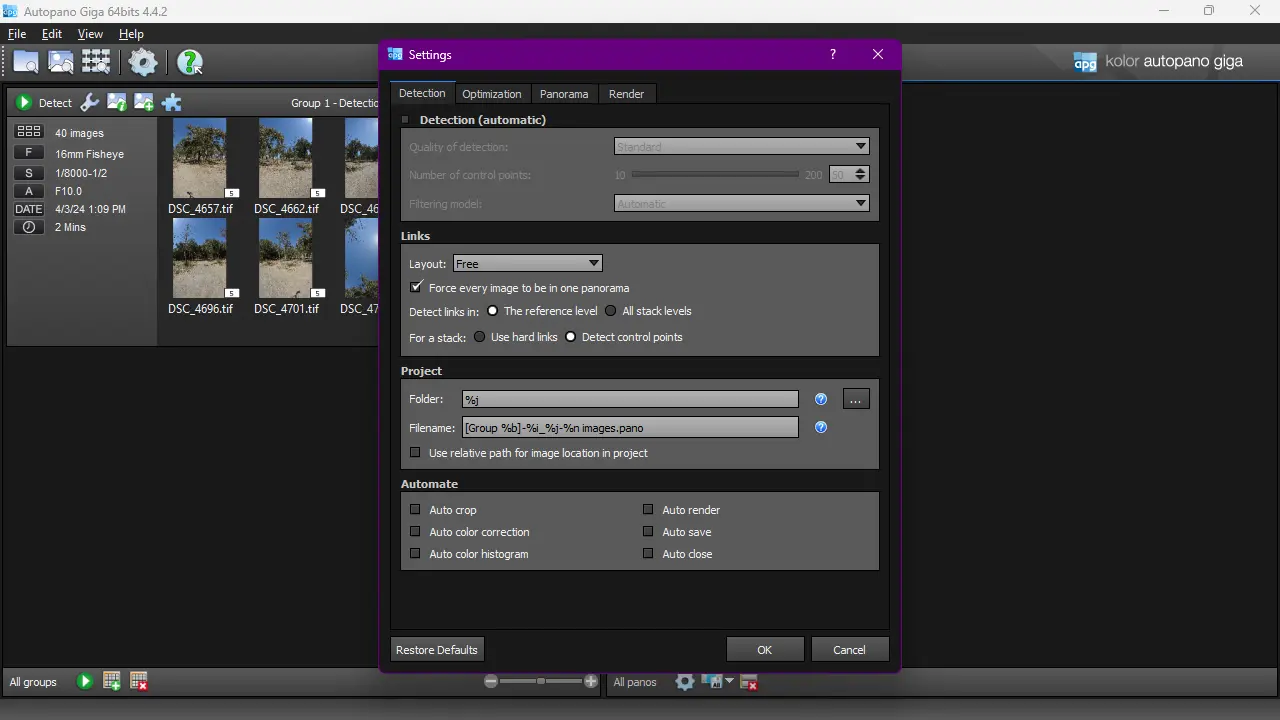
In Optimization tab use automatic settings.
In Panorama tab:
Disable Color correction, and enable Exposure and Vignetting. Make sure that Default projection is Spherical, and Default crop set to Maximum projection range.

In Render tab:
For the Blending Preset choose Anti-ghost, and for the output Format select .exr with PIZ compression.
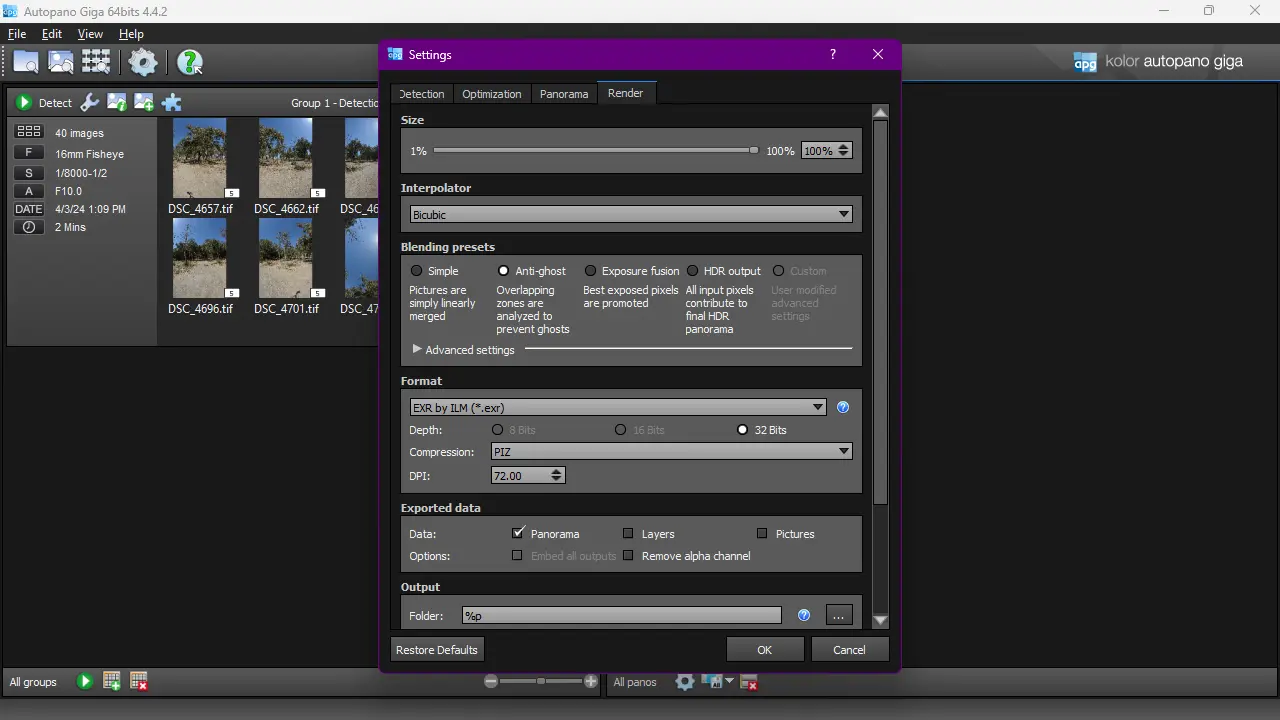
Once everything was set up accordingly, click OK to close window.
6. Detect panorama
Use Detect panorama (green button with arrow), and wait, it should take less than a time indicated below the date label
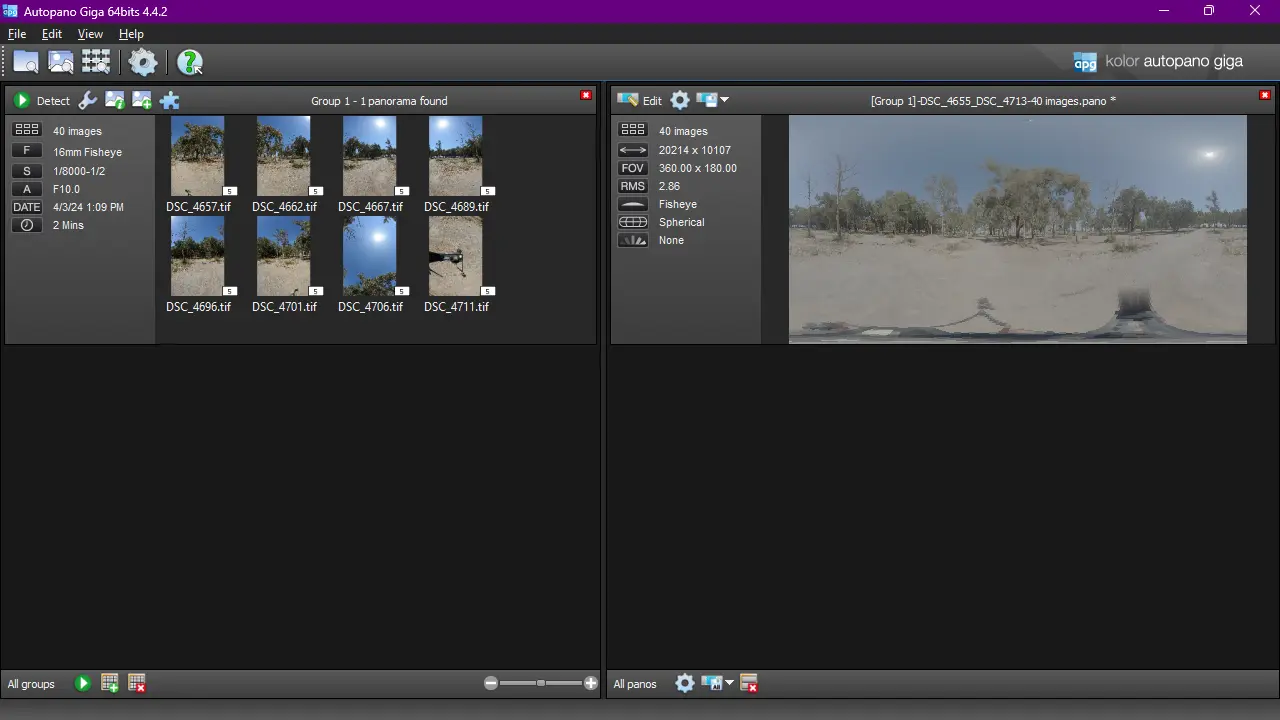
7. Edit panorama
Click on the Edit panorama icon, new window will appear:

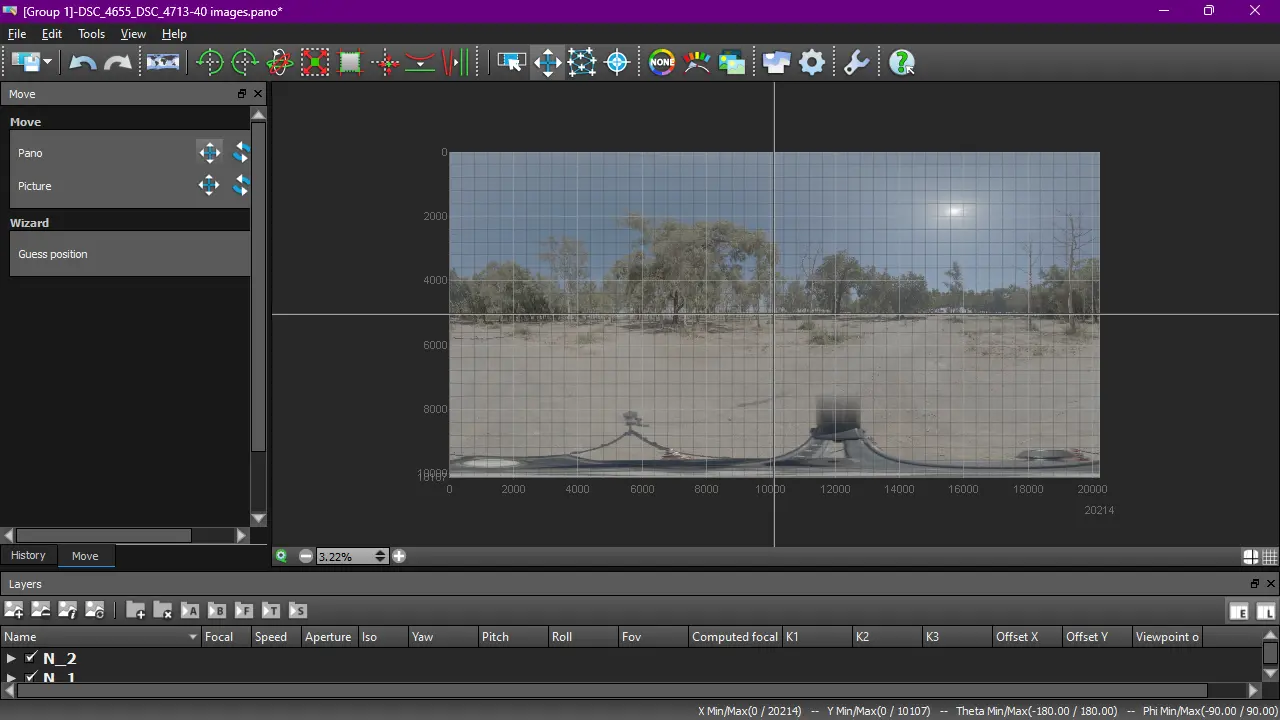
8. Straighten panorama
If you need to straighten panorama, simply use Move images mode. This tool has two modes: Pano pan and Pano rotate, and can work for whole panorama or particular picture. Activate mode you want, and drag and pull whole panorama or particular image.
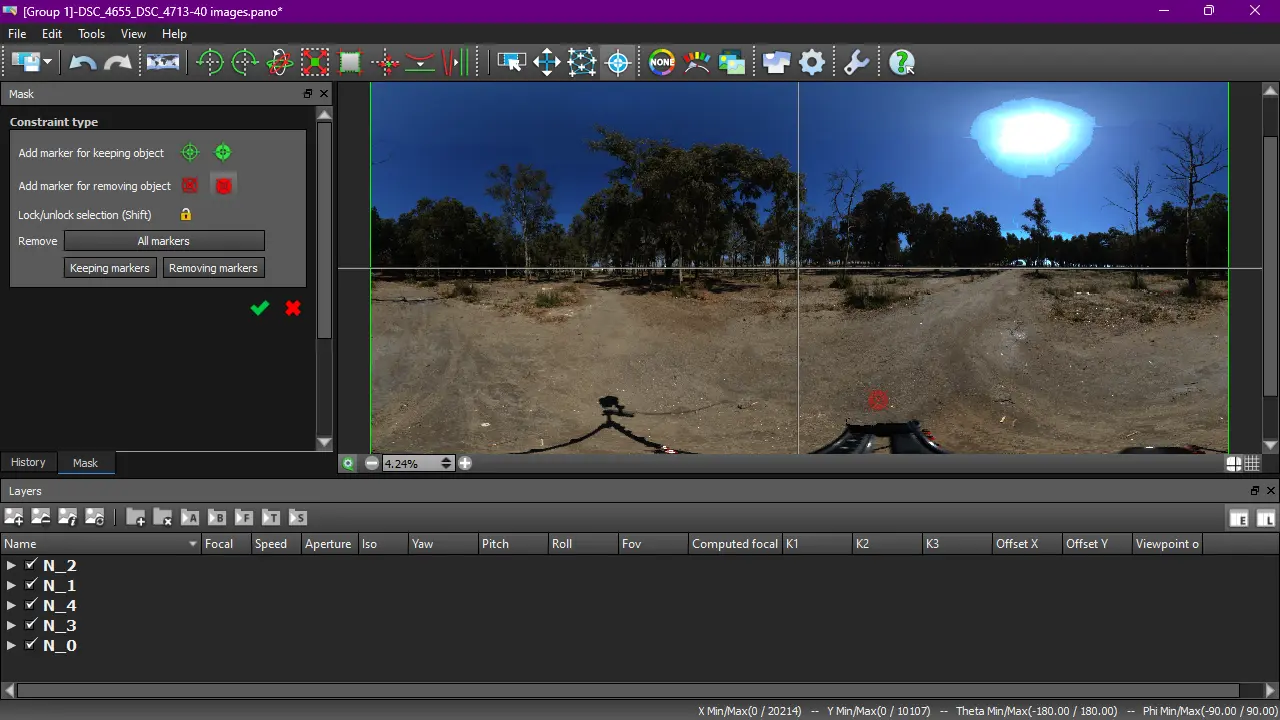
9. Masking nadir
During my test, I realized that the Mask tool was not effective for HDRIs, but it’s still worth a try. As a workaround, you could export or render the HDRI map as layers and then mask it in Photoshop or Gimp. However, a more efficient method would be to clean the nadir photos in Lightroom or RawTherapee before exporting them and use these cleaned photos as source files.
To remove arm of the panoramic head or any part you don’t want to see, choose red marker that applies on whole stack, and place it on the region of layer you don’t want to see.
Tip: Scroll with a mouse wheel to choose bracketing photo which is not too bright or too dark.
Don’t forget to Apply it (green check mark icon).
If you want preview masking, click on the green icon Preview in the bottom left corner of the window.
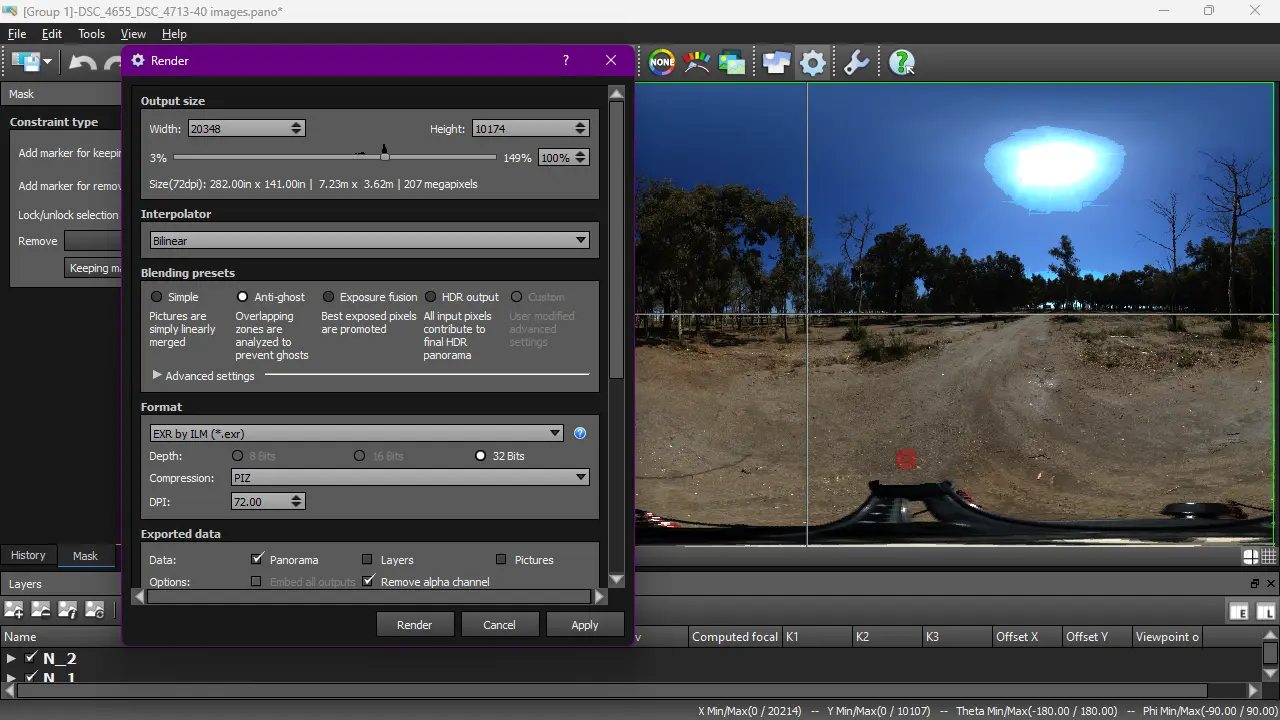
10. Rendering
You can initiate rendering from the Edit Panorama window or the main view. Click on the gear icon; a new window will pop up. Select the desired resolution and output filename. To start rendering, press the Render button at the bottom of the window and wait.
Once it’s finished rendering you can patch nadir or sky using trial version of Pano2VR. More info in How to Create HDRI Maps: A Step-by-Step Tutorial – HDRMAPS™
Alternative – to patch nadir or sky on MacOS, you can use Photoshop plugin Flexify 2 from Flaming Pear, around 50 EUR. Runs on Apple silicon as well.
Thank you for your input. Last time I have tried to patch 20K hdri Flexify crashed, need to test it out once again. Much better and stable solution is to use old version of Pano2VR trial. You can learn more from my tutorial https://hdrmaps.com/blog/how-to-create-hdri-maps/
❤️
I have installed twice and rebooted and will not open . Is there a previous version I can try ?
same. I have installed but the program will not open in Wondows 11
Any suggestions?