FLIP Fluids is a paid Blender add-on for liquid simulation which can be purchased for 76$ on Blender Market. However, you can compile it on your own for free from source code. It’s very easy and takes no longer than 10 minutes of work. Only one difference between compiled free and the paid version is that paid version comes with some simulation presets and materials, however you can still copy some presets from DEMO version which is also available on GitHub. This tutorial is for Windows operating systems only. Let’s get started.
1. MinGW – package for GCC compiler on Windows
Downloading:
Click here and scroll down to find x86_64-posix-sjlj package, download it to your computer. Unpack it to some directory, preferably on the drive C, for easy access. In my case it is “C:\Other Programs\mingw64\”. You’d need 7-zip to unpack it.
Adding a path to the System Environment Variables:
- Press Winows key and type: ‘Variables‘ in the language of your system, to find Edit The System Environment Variables. Click on the button outlined with red color.
- Select Path and click Edit.
- Click on button New, to add new path
- Paste path to unpacked MinGW /bin directory and click OK
2. CMake – system that manages the build process
Downloading:
Go here and download Windows x64 Installer to your computer.
Install CMake:
Install it as any other program for Windows.
Don’t forget to add CMake to the SYSTEM path during installation.
3. FlipFluids add-on compiling from source code
Download Flip Fluids:
Download FLIP Fluids source code from GitHub. You can do it using Git or SVN, or just simply click on Code button and Download ZIP. Unzip it to some directory, for easy access. I have unzipped it to ‘C:\Blender-FLIP-Fluids-master’.
Compiling:
Compile is the creation of an executable program from code written in a compiled programming language.
- Copy CMakeLists.txt file from C:\Blender-FLIP-Fluids-master\cmake directory to the root directory (C:\Blender-FLIP-Fluids-master\) of source code.
- Open windows Command Prompt, you can run it easily by pressing the Windows key and typing: cmd
- Go to the directory with unzipped code using MS-DOS command :
cd C:\Blender-FLIP-Fluids-master- Create a build directory with command mkdir and go inside of it with command cd:
mkdir build
cd build- Run following commands line by line:
cmake .. -DBUILD_DEBUG=ON -G "MinGW Makefiles"
cmake --build .
cmake .. -DBUILD_DEBUG=OFF -G "MinGW Makefiles"
cmake --build .
Everything should work fine and without any problems, and you shouldn’t see any errors in the terminal. Please keep in mind that cmake –build command can take even a few minutes, depending on how powerful your PC is. Your newly compiled add-on can be found now in C:\Blender-FLIP-Fluids-master\build\bl_flip_fluids directory
4. Install and enable FLIP Fluids add-on
- Open “C:\Blender-FLIP-Fluids-master\build\bl_flip_fluids” directory in File Explorer, and copy flip_fluids_addon directory (ctrl+c)
- Go to your Blender add-ons directory. I am using Blender 3.1 and my directory is: C:\Users\yourusername\AppData\Roaming\Blender Foundation\Blender\3.1\scripts\addons.
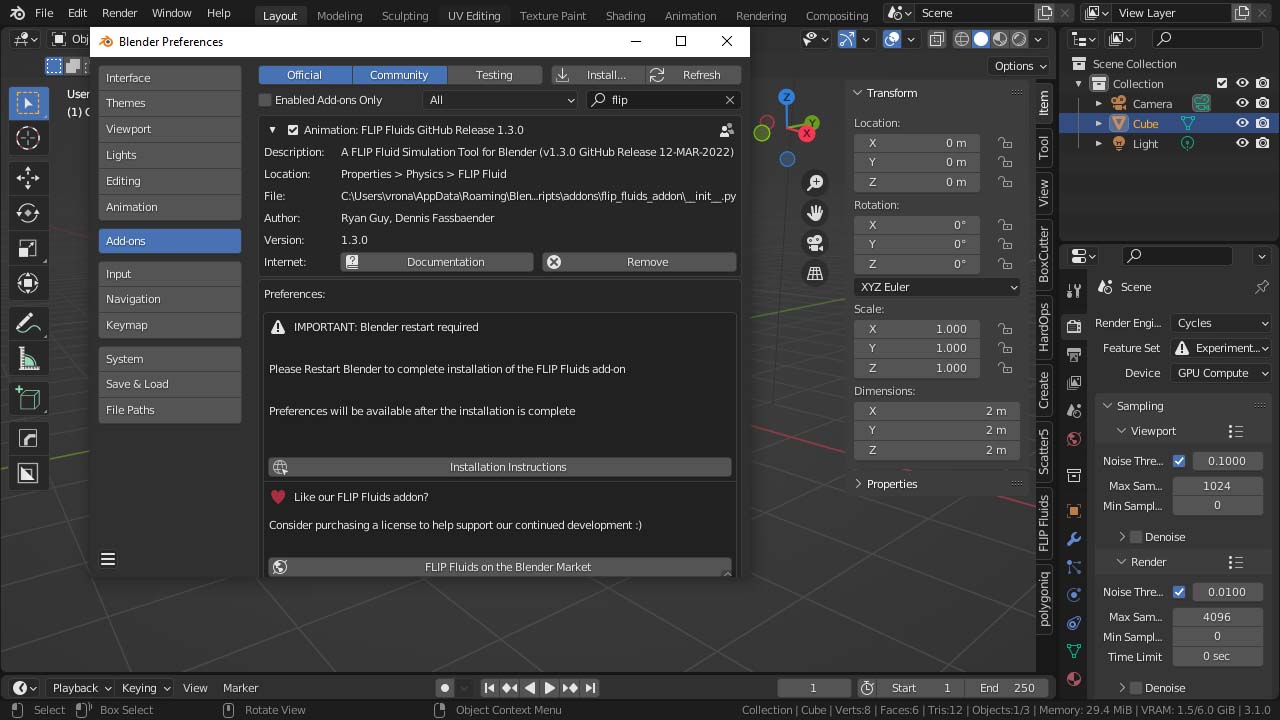
For this open disk C > Users, find your username. You need to enable in View > Hidden items to see AppData directory. Next go to Roaming > Blender Foundation > Blender > Choose Blender version here > scripts > addons. And paste previously copied flip_fluids_addon here (ctrl+ v) - Start Blender. Go to Edit > Preferences > Add-ons and type “flip”.
- Enable and add-on and restart Blender. FLIP Fluids add-on is now ready to use.
Thank you so much!! I have been trying to get it right for SOOO LONG. Best guide, god sent.
Hi there, I’ve got an error even by following your exact steps, it tells me :
CMake Error: CMake was unable to find a build program corresponding to “MinGW Makefiles”. CMAKE_MAKE_PROGRAM is not set. You probably need to select a different build tool.
CMake Error: CMAKE_C_COMPILER not set, after EnableLanguage
CMake Error: CMAKE_CXX_COMPILER not set, after EnableLanguage
— Configuring incomplete, errors occurred!
How can I fix it ? Thx a lot !