Quick instruction on how to use new Intel Open Image Denoise function in Blender 2.81
Blender 2.81 is not yet here, but you can download the latest build from Blender Experimental Builds and use it. It is not recommended for production work.
I am using Blender 2.81 daily because it has improved Outliner and new Intel’s denoising capabilities. To download the latest Blender 2.81 I recommend using Blender Version Manager. This minimalistic plugin checks if there is a new version of Blender 2.81 and with one click you can download the latest release package and extract to your drive. I try to keep at least one previous version on my drive in any case that latest version is not very stable, which sometimes happens.
What is Intel Open Image Denoise?
Intel® Open Image Denoise is an open-source library of high-performance, high-quality denoising filters for images rendered with ray tracing. Learn more here…
What does it mean?
That it should work with all images rendered with ray tracing (most of the 3D rendering engines).
It won’t work with your holiday photos unfortunately, 3D renders only, sorry.
Test scene set-up
For testing purposes, I will use BMW demo scene from Blender’s Demo Files.
1. Download it from here and unzip to your disk.
2. Launch Blender 2.81and open project. I recommend disabling option Load UI if you don’t like custom interface settings, loaded with the project.
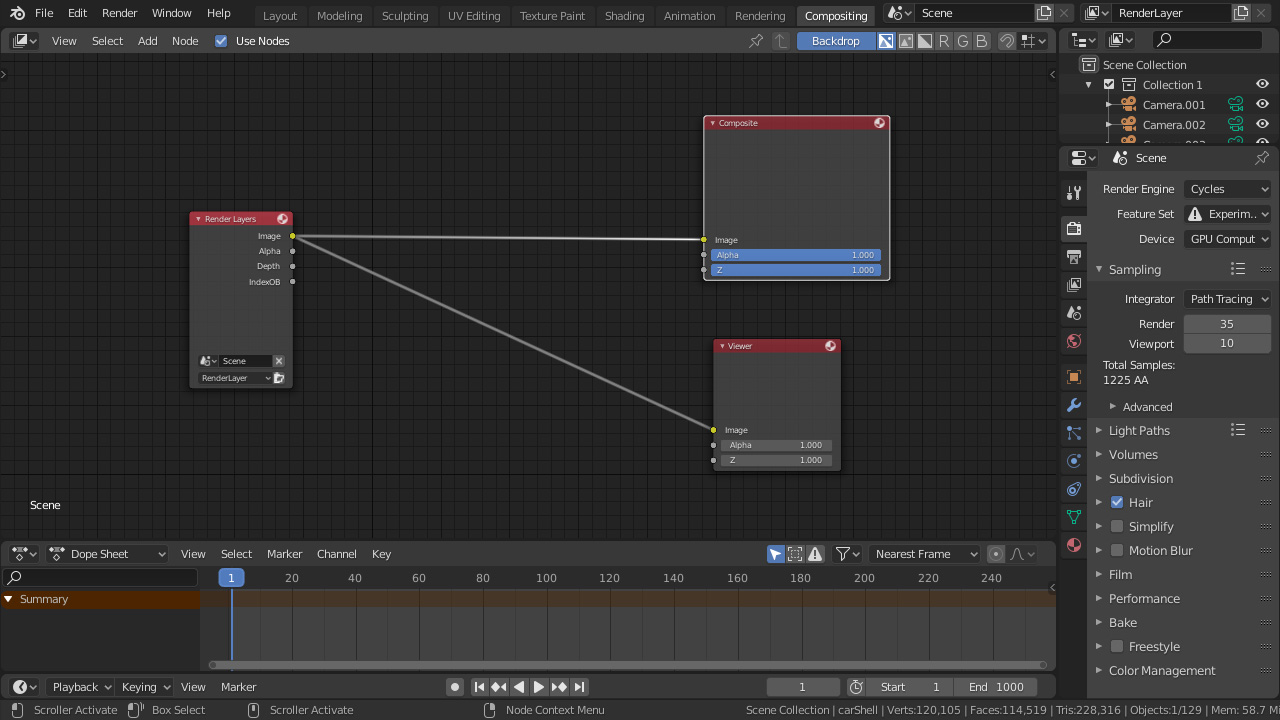
3. Go to Compositing tab and delete all nodes, and leave only Render Layers, Composite and Viewer. Connect Render Layers to Composite and Viewer node as shown below:
Render settings
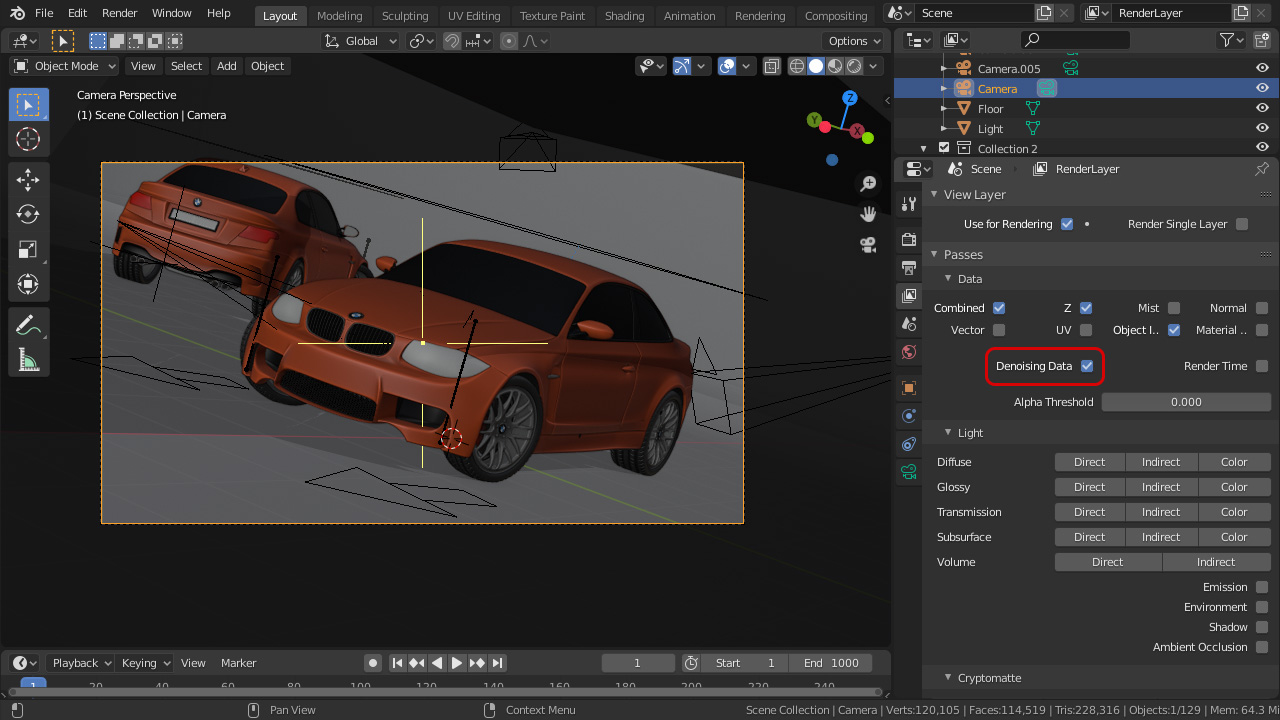
- Switch to active Camera (ctrl + Num 0). In Blender 2.81 active camera has an icon on gray background in the outliner.
- Make sure that your Device is set to GPU, lower the Sampling to 20. I also recommend to use lower values for Render Properties > Pefromance > Tiles. I have found that 32 for X and Y is the most optimal with my hardware setup. I am using dual CPU old HPZ600 Workstation with 32GB of RAM and gamer GPU GTX1060.
Intel Denoiser set-up
1. To set up Intel’s denoiser you’d need to use nodes in Compositing tab. But first, we need to let the denoiser data to be accessible from nodes. Go to View Layer Properties > Passes and check Denoising Data
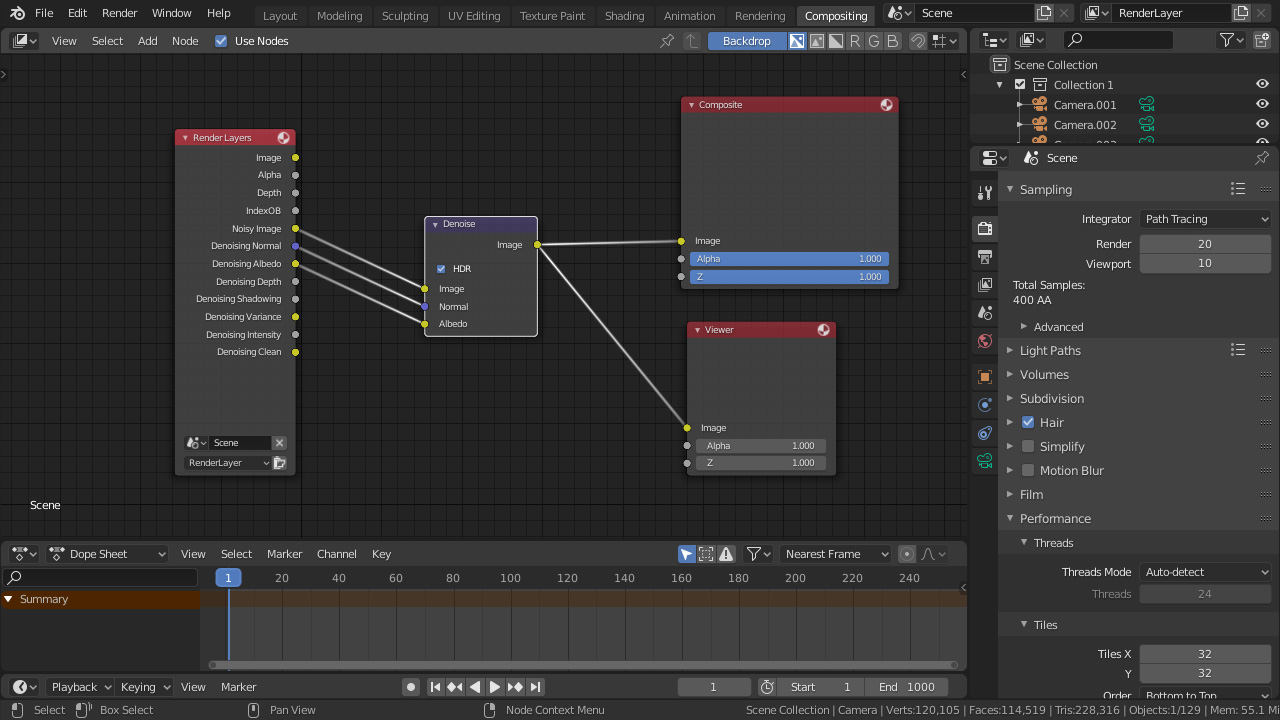
2. Now let’s jump to Compositing tab and search for (Shift + A) Denoise node. Connect all nodes as shown in the picture below and hit F12 to render.
Test render with 20 samples took on my machine 1 minute and 15 seconds. To achieve the same quality as with Intel’s denoiser I had to render a test scene with default 35 samples which took me to render in 3:46min on my hardware set-up, which is more than the double-time.