In this tutorial you will learn how to use and setup video light textures, so they work in Cycles and Eeevee.
Without further ado, let’s get started! First, you’d need to get video of swaying trees in the wind. You can record it on your own using your camera or even a smartphone, but if you are lazy, just get it from here. For 5 euros only, you’d get 4K video footage ready to use.
I have created simple scene, consisting some free photogrammetry based models, downloaded from Sketch Fab.
Main source of the light is default Point Light, but you can use any type of the lighting in your scene, including hdri map and sky texture.
Gobo light texture setup for Cycles
- Create a plane, matching proportions of video.
For this, I need to scale a plane 16 times on x-axis, and 9 times on y-axis, as my video has widescreen 16 to 9 ratio. Scale it down, and apply scale. Place it above your scene. - Time to add material. I am gonna name it: Gobo Light Texture.
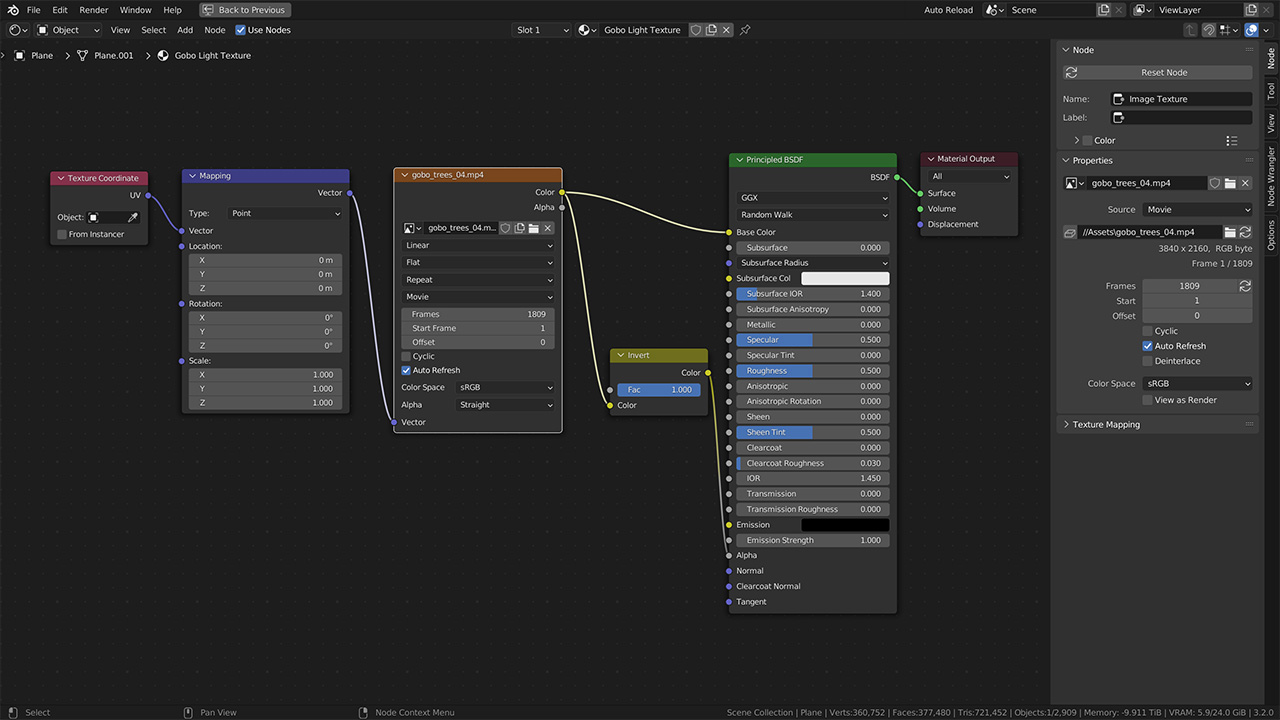
- With node wrangler add-on enabled, add texture. Load video file. Preview video on the plane.
- Looks like I need to UV unwrapp. I am going to flip plane on the Y-axis, as I like it more that way.
- With video texture node selected, go to the node properties. Click on Match Movie Length button. Don’t forget to check Auto Refresh option.
- Start Cycles render preview. Looks like plane is blocking all rays from the point light above. Very good. Add invert node, connect it with video texture output, and use it as a mask for shader’s alpha.
- Examine animation, using timeline or transport controls. Everything looks good. Done.

Gobo light texture setup in Eevee
- Change rendering engine to Eevee
- As you can see, it is not working correctly.
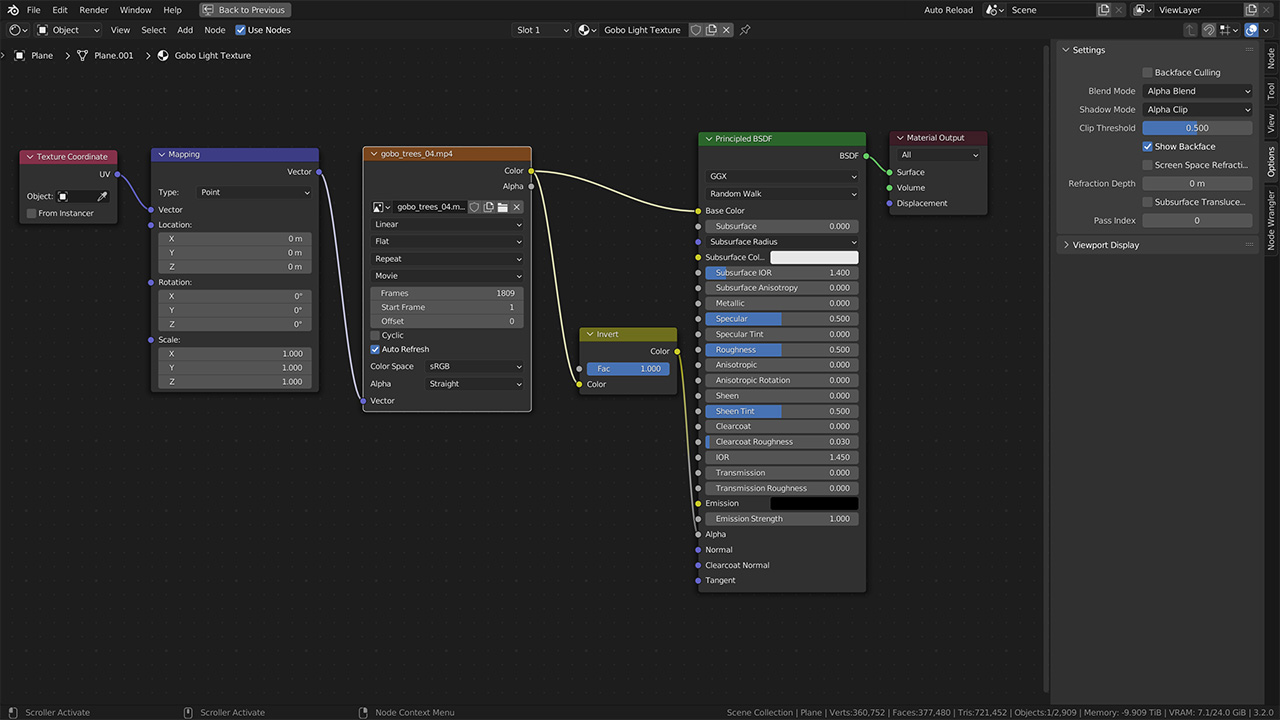
- To fix it go to the node material options.
- Set Blend mode to Alpha Blend, and Shadow Mode to Alpha Clip.
- Everything looks fine now, also in Eevee.
